Configuring Call Center Parameters
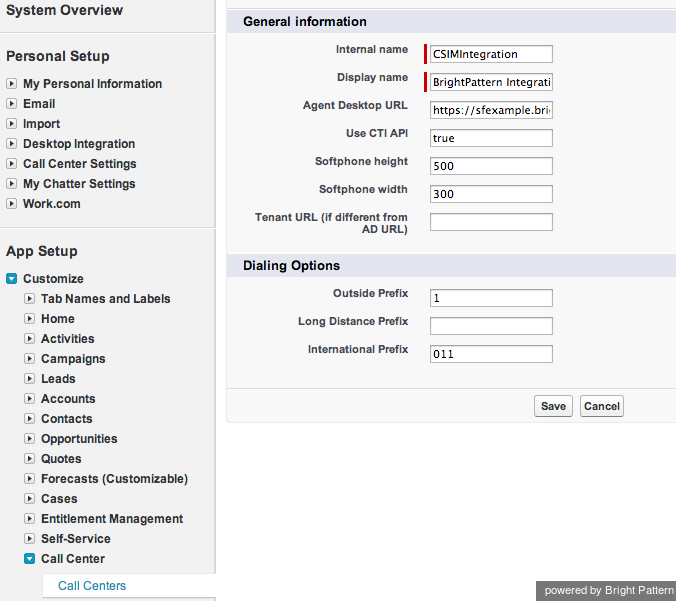
Step 1. In Salesforce, from Setup, click Customize > Call Center > Call Centers > Manage Call Centers. If the Introducing Salesforce CRM Call Center splash page appears, click Continue.
Step 2. Click Edit “BrightPattern Integration” (this is one of the apps deployed with the package).
Step 3. In Call Center Details, modify the following ServicePattern Agent Desktop URL by replacing <tenant-name>.<service-provider-domain-name> with your ServicePattern tenant access URL (see example):
https://<tenant-name>.<service-provider-domain-name>/agentdesktop?enableSFOpenCTI=1&sflogin=1&apexClass=BrightPattern.CSIMIntegration
EXAMPLE:
Step 4. In Call Center Details, modify the Tenant URL by replacing example.com with your fully qualified tenant URL (e.g., example.brightpattern.com)
Step 5. Make sure that Outside Prefix is set accordingly to the current Dial-out entry in the Service Pattern tenant configuration. This prefix will be added by Salesforce to any number that going to be dialed using the “Click-To-Call” feature.
Step 6. Assign SFDC users to the call center.
1. From Setup, click Customize > Call Center > Call Centers.2. Click the name of the call center to which you want to assign users.
3. In the Call Center Users related list, click Manage Call Center Users.
4. Click Add More Users.
5. Specify criteria to find the users who should be assigned to the call center.
6. Click Find. Note that all users who already belong to a call center will be excluded from the search results because a user can only be assigned to one call center at a time.
7. Select the checkbox next to each user who should be assigned to the call center and click Add to Call Center.
- Note: To re-assign a user to another call center, first remove this user from the currently assigned call center and then add the user to the desired call center. You can view the currently assigned call center in the “User” detail page.
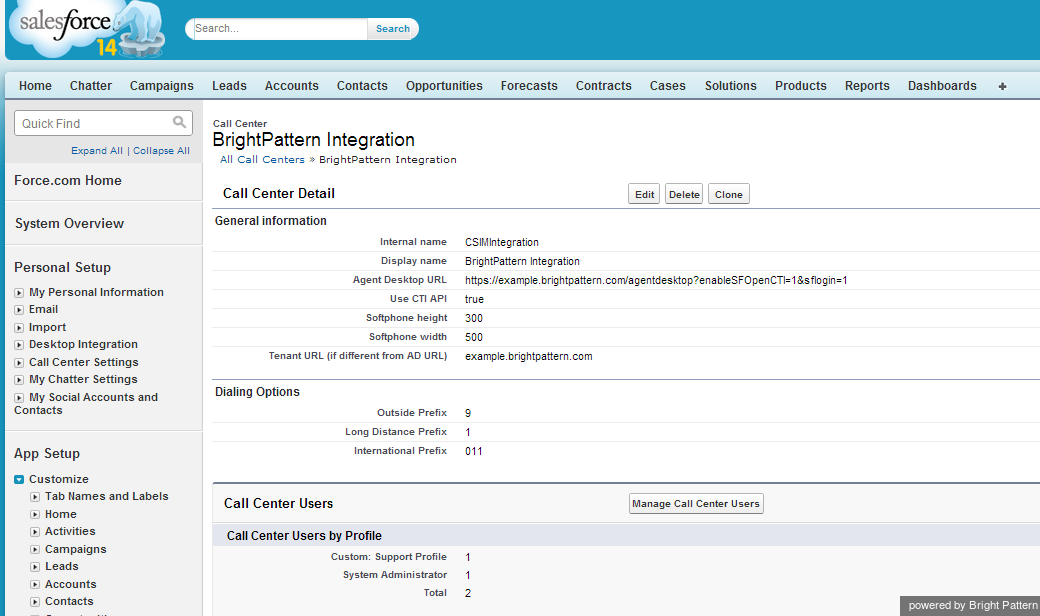
Step 7. Return to the newly created Call Center; the result should be similar to the one shown below.


