Contents
- Introduction
- Configuration
- Prerequisites
- Zendesk Integration Setup
- Single Sign-On Setup
- Screen-Pop
- Accessing Zendesk Data from Scenarios
- Features and Usage
- Integrated Agent Desktop
- Built-In Softphone and Click-to-Call
- Live Chat and SMS
- Activity History
- Call Center Supervisor
- Using Zendesk Integration Scenario Blocks
- 1 Zendesk Integration Scenario Blocks
- 2 Example Scenario
Zendesk Integration Scenario Blocks
A scenario is a script that defines the logic of automated processing of interactions satisfying some specific criteria (e.g., inbound interactions arriving at a specific access point). In Bright Pattern Contact Center software, scenarios are used to map out the sequence of actions that may occur during an interaction (voice, chat, SMS, etc.), with all the possible options, exits, prompts, and so forth, that could be presented to a user or customer.
Scenarios are built and defined in the Bright Pattern Contact Center Scenario Builder application, which is available via the Bright Pattern Contact Center Administrator application. You can create your own scenario from scratch, or you can use a template scenario (easier) and then customize it to suit your needs. Scenarios are constructed using "blocks," which you can learn about in more detail in the Scenario Builder Reference Guide.
For the purpose of this Zendesk Integration Guide, let's consider the integration scenario blocks that could be used in a simple scenario involving look-ups to recognize the customer and screen-pop of the customer's Zendesk data.
Example Scenario
What follows is the sequence of actions that could occur in a basic scenario flow.
Action 1: An inbound call comes in, and the customer is prompted for information.
A customer calls Bright Pattern Support. (For simplicity, service hours verification is omitted, and agent skill requirements are identified by the dialed number.) The customer is greeted with a Collect Digits block with the following prompt: Welcome to Bright Pattern support. If you are calling about an existing case and have the case number, please enter it now followed by the pound sign. Otherwise please remain on the line.
Action 2: The customer does not enter a case number, so the scenario identifies the customer by caller ID.
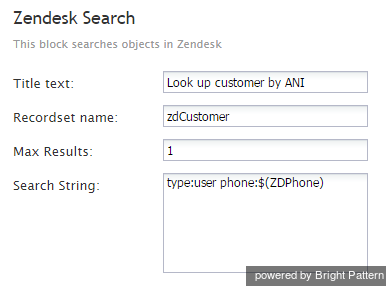
If the customer does not enter any digits, a Zendesk Search block is used to recognize the customer by ANI (Caller ID).
Action 3: The customer's data is pulled from Zendesk data and popped to the agent.
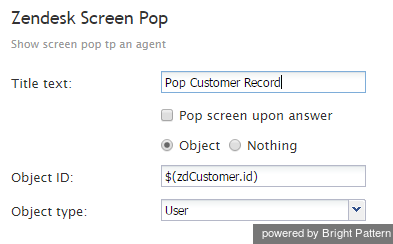
If the customer record is found, a Zendesk Screen Pop block is used to pop the customer record into the Zendesk application of the agent that will receive the call. The call is then sent to the service queue.
Action 4: The scenario looks up case/ticket data.
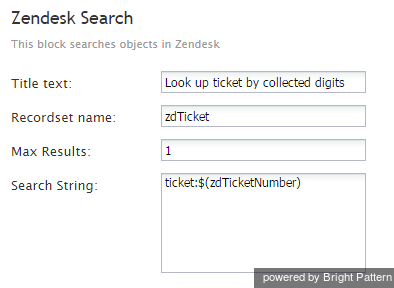
If the ticket number is entered, a Zendesk Search block is used to look up the ticket information.
Action 5: The customer is directed to a menu.
A Menu block is then used with the following prompt: Thank you. We have found the ticket with subject $(zdTicket.subject). For the status of this ticket, press 1. For any other inquiries, press 2 or stay on the line.
Action 6: A prompt regarding ticket status is played to the customer.
If the self-service is selected, a Play Prompt block is used to inform the customer about the current ticket status: The current status of this ticket is $(zdTicket.status). Thank you for your inquiry. Goodbye. The call is then marked as self-served and released.
Action 7: The customer's ticket/case information is popped to the agent.
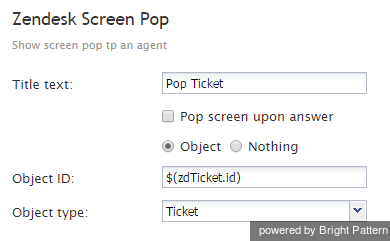
If the customer needs the agent's help, a Zendesk Screen Pop block is used to pop the ticket to the Zendesk application of the agent who will receive the call. The call is then sent to the service queue.
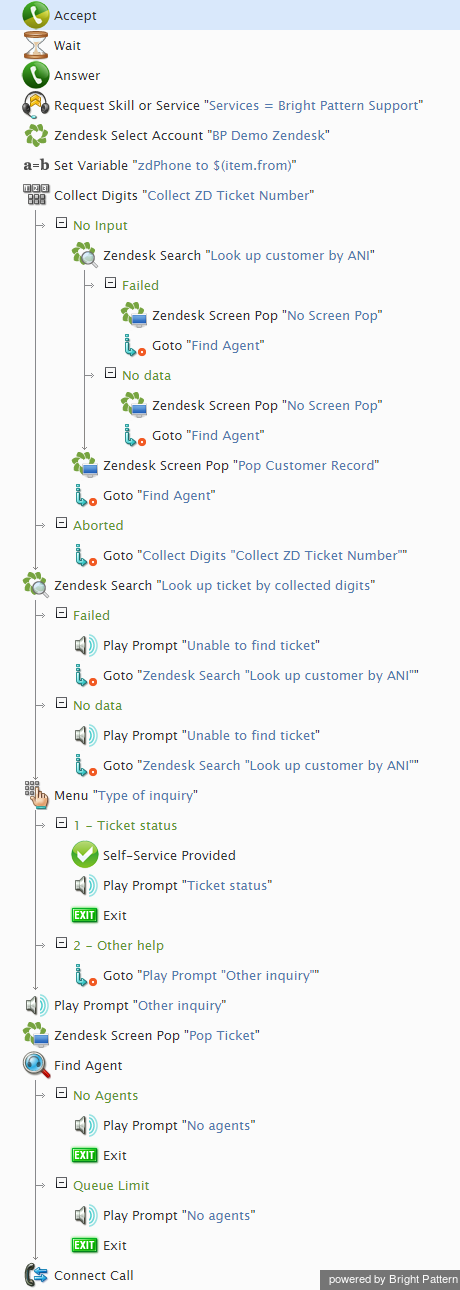
The Complete Scenario
The diagram shown illustrates what a complete scenario looks like when designed in the Scenario Builder application.
For more information about scenarios, refer to the Scenario Builder Reference Guide.

