From Bright Pattern Documentation
Individual Campaign Metrics View
In addition to the general campaign view described in the previous section, you can define a custom metrics view for each campaign individually. To define a custom view for a particular campaign, first select this campaign in the general metrics view.
The name of the selected campaign will appear under the general campaign view with a pre-defined set of metrics.
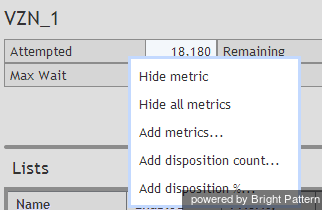
To make any changes is the current set of metrics, click the black triangle that appears next to a metric name when you mouse over it. A menu of customization options will appear.
- To hide the metric for which the menu was invoked, select Hide metric.
- To hide all metrics currently present in the individual campaign view, select Hide all metrics.
- To add any metric from the set of the available campaign metrics, select Add metrics and select the desired metrics from the menu that appears. (You can use the green “+” sign for the same purpose.) The metrics in this menu are the same as in the General Campaign Metrics View; for their descriptions, see section List of Campaign Metrics
- To add a metric for the number of call attempts with a specific disposition since the beginning of the reporting interval, select Add disposition count and select the desired disposition from the menu that appears. You can use the green “+” sign for the same purpose.
- To add a metric for the percent of call attempts with a specific disposition relative to the total number of call attempts made since the beginning of the reporting interval, select Add disposition % and select the desired disposition from the menu that appears. You can use the green “+” sign for the same purpose.


