Contents
- Introduction
- Integration Steps
- Prerequisites
- Integrated Desktop, Click-to-Call and Activity History
- 1 Single Sign-On
- Access to Zendesk Data from Scenarios
- Scenario Example
Single Sign-On
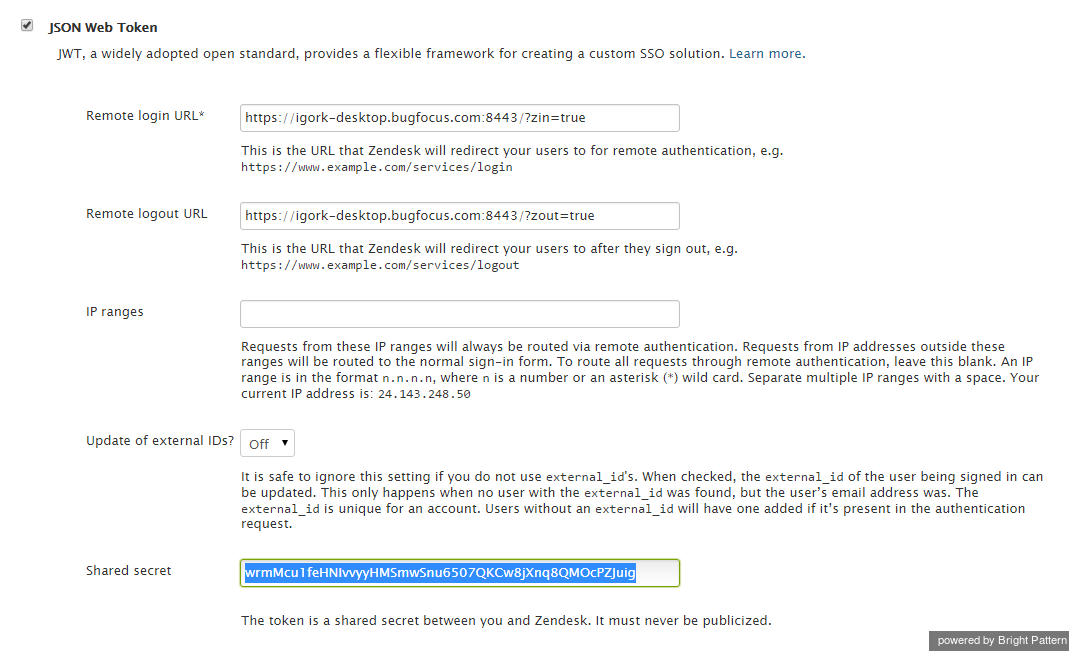
Step 1. Log into your Zendesk application, click the Admin icon and go to the Settings > Security page.
Step 2. Click Single Sign-on (SSO) and select the JSON Web Token checkbox.
Step 3. Set Remote login URL to https://<tenant-name>.<service-provider-domain-name>/agentdesktop?zin=true
Step 4. Set Remote logout URL to https://<tenant-name>.<service-provider-domain-name>/agentdesktop?zout=true
Step 5. Select the content of the Shared Secret field and copy it to the clipboard.
Step 6. Click Save.
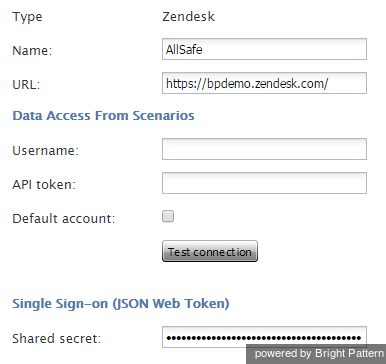
Step 7. Open the ServicePattern Contact Center Administrator application, go to Call Center Configuration > Integration Accounts, click Add account, select Zendesk, and click OK.
Step 8. Create a Name for this integration account.
Step 9. Paste the clipboard content to the Shared secret field.
Step 10. Copy your Zendesk domain URL and paste it to the URL field.
Step 11. Click Apply.
Step 10. To test SSO, sign out of Zendesk. You will be re-directed to ServicePattern Agent Desktop login page. Log in with your ServicePattern credentials. You should be simultaneously logged on to both Zendesk and ServicePattern systems.
Note: From this moment, every time you enter URL of your Zendesk desktop, you will be redirected to the ServicePattern Agent Desktop login page for a single sign-on. To log into Zendesk directly (without a simultaneous login to ServicePattern), use the following URL: https://<zendesk-domain-name>/access/normal.


