Enabling Single Sign-On
Step 1. Enable the organizational domain. For more information, see http://help.salesforce.com/apex/HTViewHelpDoc?id=domain_name_setup.htm&language=en_US
Registration of the domain may take up to 24 hours.
Deploy the domain to assigned Users. All users must log in using this domain URL, which should be in the following format:
https://<your-domain-name>.my.salesforce.com/
Step 2. Customize the connected app.
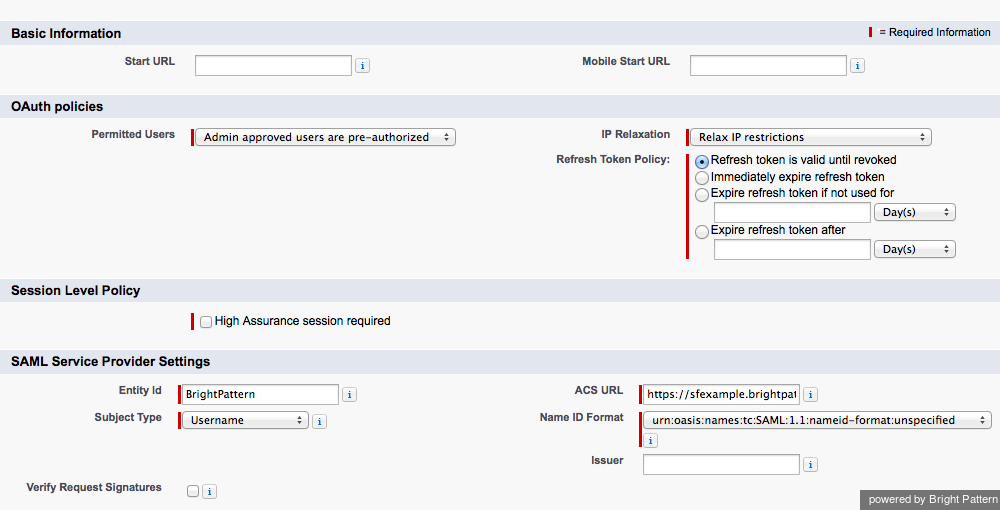
Go to Administration Setup > Manage Apps > Connected Apps > BrightPattern
Edit the following App settings:
- IP Relaxation: Relax IP restrictions
- Refresh Token Policy: Refresh token is valid until revoked
- ACS URL: https://<your-ServicePattern-tenant-URL>/agentdesktop/agentdesktop/sfsso/response
Click Save
Step 3. User Profiles (Login Mapping – Custom Attribute)
The SFDC Single Sign-On integration requires User Profiles assigned for users that are going to utilize ServicePattern and be authenticated by the SFDC Identity Provider. The following process maps the Single Sign-On parameters to the ServicePattern login ID.
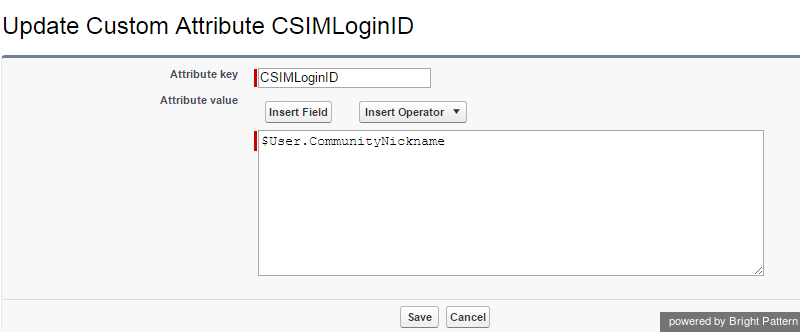
Go to Administration Setup > Manage Apps > Connected Apps > BrightPattern, select BrightPattern, scroll down to Custom Attributes and click edit:
ServicePattern uses one optional custom service provider “Attribute key”: CSIMLoginID
This Attribute could be matched with any user’s field. By default it is configured to match the SFDC User Nickname ($User.CommunityNickname).
- Note: If this attribute mapping is removed and no other attribute is specified, then the login ID will be taken as part of the SFDC username before the '@' sign.
Step 4. Setup the “Single Sign-On” integration with ServicePattern.
The ServicePattern integration account configuration requires the full SFDC URL (starting with <your-salesforce-domain>...) for use in the Call Center configuration Integration Accounts. This URL is available via the SFDC browser by right-clicking on the URL and choosing Copy Link Address as required.
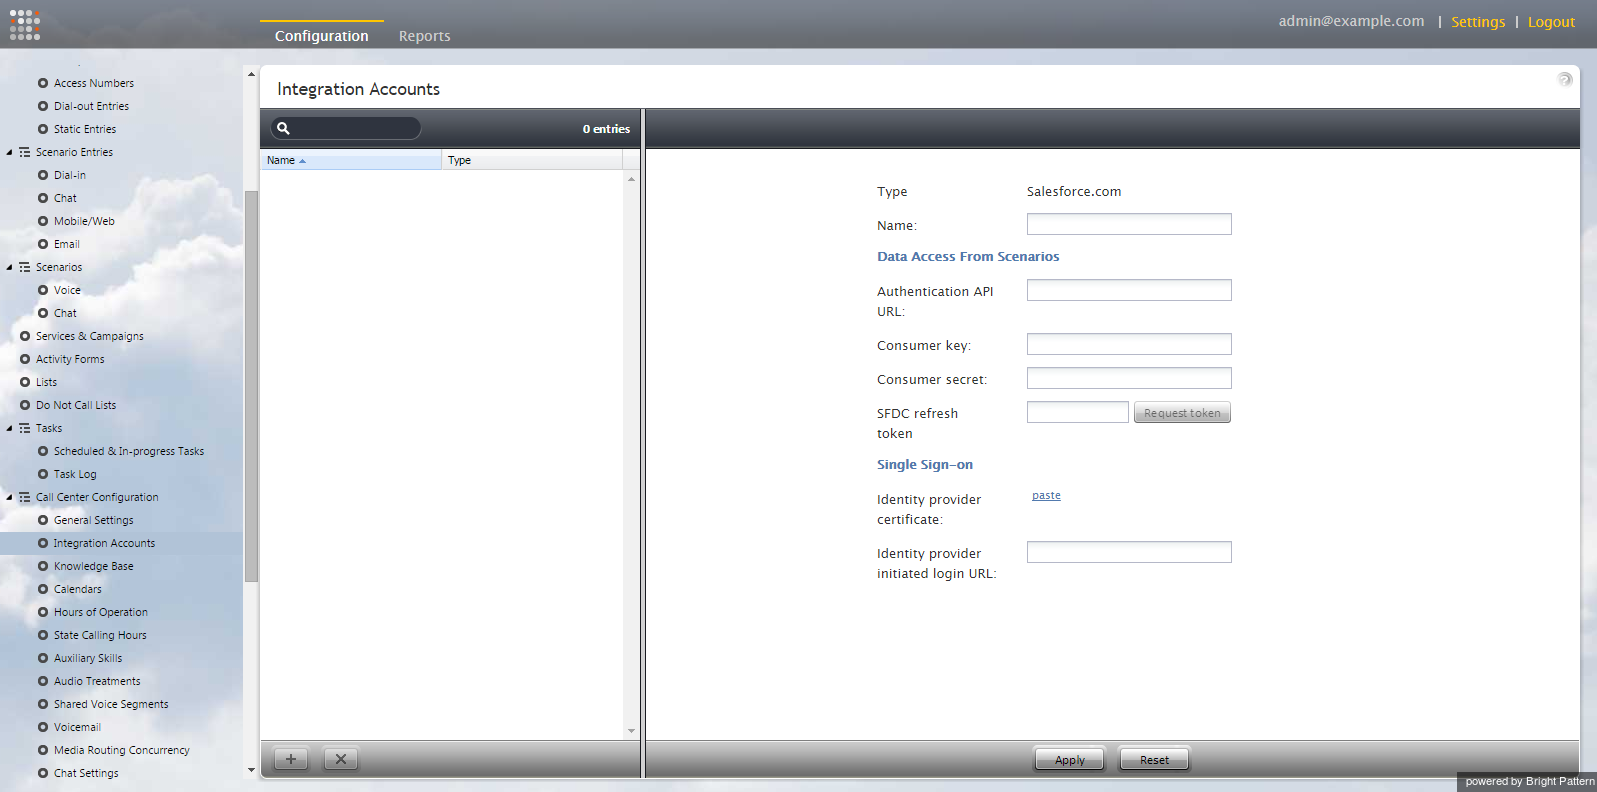
Open the ServicePattern Contact Center Administrator application, select Configuration > Call Center Configuration > Integration Accounts and click “+” to create a new Integration Account.
- Specify an account name
- Provide the SFDC Identity Provider Certificate:
Open Administer (or Administration Setup), select Security Controls | Certificate and Key Management and click Download Certificate. Open the downloaded file in Notepad (or Notepad ++) and copy the Certificate content only (i.e., the text between -----BEGIN CERTIFICATE----- and -----END CERTIFICATE-----) and paste into the Salesforce Integration Account on ServicePattern.
- Provide the Identity provider initiated login URL:
From Administer (or Administration Setup), select Manage Apps, click Connected Apps and select the App created earlier. Copy the full URL from the Login Information > Idp-initiated Login URL.(Copy the URL by using the Copy/Paste menu; it will be automatically prefixed with the domain URL as created earlier, for example: https://<your-sf-domain>.salesforce.com...)
Paste the copied Login URL (full URL) into the Salesforce Integration Account on ServicePattern.


