From Bright Pattern Documentation
(→Importing and Modifying Report Templates) |
m |
||
| Line 1: | Line 1: | ||
<translate>= Importing and Modifying Report Templates= | <translate>= Importing and Modifying Report Templates= | ||
To work with and customize report templates in ''.jrxml'' format, you must first import them to Jaspersoft Studio using the following steps. | To work with and customize report templates in ''.jrxml'' format, you must first import them to Jaspersoft Studio using the following steps. | ||
| − | |||
== How to Import Report Templates == | == How to Import Report Templates == | ||
=== Step 1: Create a folder to store your reports === | === Step 1: Create a folder to store your reports === | ||
| − | # In Jaspersoft Studio, navigate to the ''Project'' tab in the left-hand part of the screen. | + | # In Jaspersoft Studio, navigate to the ''Project'' tab in the left-hand part of the screen.<br /><br /> |
| − | # Select '''MyReports'''. | + | # Select '''MyReports'''.<br /><br /> |
| − | # Right-click '''MyReports''' and then select '''New > Folder'''. | + | # Right-click '''MyReports''' and then select '''New > Folder'''.<br /><br /> |
| − | # In the dialog box that pops up, select parent folder '''MyReports''' and name the new folder ''reports''. This is the folder that will contain your report templates. | + | # In the dialog box that pops up, select parent folder '''MyReports''' and name the new folder ''reports''. This is the folder that will contain your report templates.<br /><br /> |
# Click '''Finish'''. | # Click '''Finish'''. | ||
| − | |||
=== Step 2: Import report template files to the new ''reports'' folder === | === Step 2: Import report template files to the new ''reports'' folder === | ||
| − | # Right-click the '''reports''' folder and select '''Import'''. | + | # Right-click the '''reports''' folder and select '''Import'''.<br /><br /> |
| − | # In the dialog window that pops up, select '''File System'''. | + | # In the dialog window that pops up, select '''File System'''.<br /><br /> |
| − | # Click '''Next'''. | + | # Click '''Next'''.<br /><br /> |
| − | # Choose the folder where you have stored the report template files that you previously downloaded from the Contact Center Administrator application. These files will have ''.jrxml'' file extensions in their names. | + | # Choose the folder where you have stored the report template files that you previously downloaded from the Contact Center Administrator application. These files will have ''.jrxml'' file extensions in their names.<br /><br /> |
# Select these files and click '''Finish'''. | # Select these files and click '''Finish'''. | ||
| Line 31: | Line 29: | ||
What follows is an example of how one might modify a ''.jrxml'' report template. In this example, the column ''Case'' is removed from the out-of-the-box [[reporting-reference-guide/AgentActivityReport|Agent Activity Report]] and the formatting/visual appearance of the report is changed. | What follows is an example of how one might modify a ''.jrxml'' report template. In this example, the column ''Case'' is removed from the out-of-the-box [[reporting-reference-guide/AgentActivityReport|Agent Activity Report]] and the formatting/visual appearance of the report is changed. | ||
| − | |||
=== Step 1: Open file agent_activity.jrxml === | === Step 1: Open file agent_activity.jrxml === | ||
| − | # In Jaspersoft Studio, navigate to ''My Reports > reports''. | + | # In Jaspersoft Studio, navigate to ''My Reports > reports''.<br /><br /> |
# Find and double-click the ''agent_activity.jrxml'' file to open it. | # Find and double-click the ''agent_activity.jrxml'' file to open it. | ||
| − | |||
=== Step 2: Select the elements you wish you change === | === Step 2: Select the elements you wish you change === | ||
| − | # Select elements ''$R{col_case_id}'' in the group header frame, and ''$F{case_number}'' in the detail frame of the last column. You can select both elements at the same time. | + | # Select elements ''$R{col_case_id}'' in the group header frame, and ''$F{case_number}'' in the detail frame of the last column. You can select both elements at the same time.<br /><br /> |
# Right-click the selected elements and select '''Delete''' to remove these elements. | # Right-click the selected elements and select '''Delete''' to remove these elements. | ||
| Line 55: | Line 51: | ||
| − | |||
</translate> | </translate> | ||
Latest revision as of 17:13, 29 August 2018
Contents
- Introduction
- Configuring Jaspersoft Studio
- Prerequisites
- Downloading Libraries and Localization Resources
- Importing Libraries
- Creating a Data Adapter
- Importing Localization Resources
- Customizing JRXML Report Templates
- Downloading Report Templates
- 1 Importing and Modifying Report Templates
- Previewing and Saving Modified Report Templates
- Uploading Modified Report Templates
- Customizing BPXML Report Templates
Custom Reporting Tutorial
Importing and Modifying Report Templates
To work with and customize report templates in .jrxml format, you must first import them to Jaspersoft Studio using the following steps.
How to Import Report Templates
Step 1: Create a folder to store your reports
- In Jaspersoft Studio, navigate to the Project tab in the left-hand part of the screen.
- Select MyReports.
- Right-click MyReports and then select New > Folder.
- In the dialog box that pops up, select parent folder MyReports and name the new folder reports. This is the folder that will contain your report templates.
- Click Finish.
Step 2: Import report template files to the new reports folder
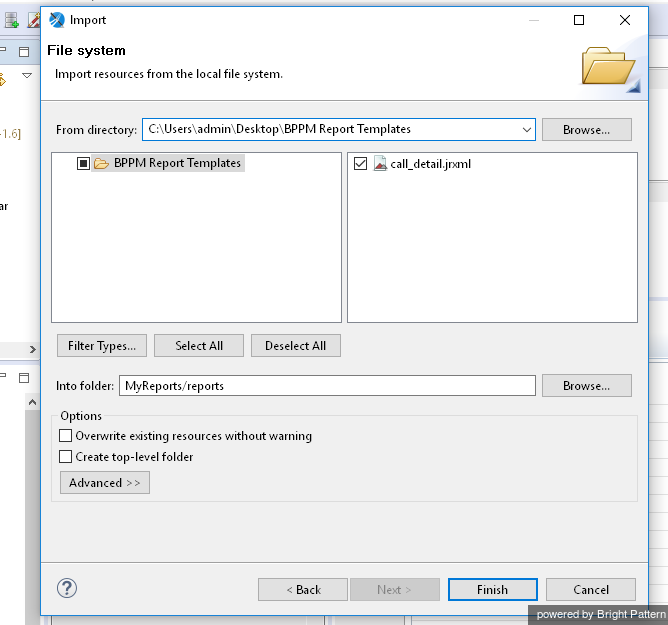
- Right-click the reports folder and select Import.
- In the dialog window that pops up, select File System.
- Click Next.
- Choose the folder where you have stored the report template files that you previously downloaded from the Contact Center Administrator application. These files will have .jrxml file extensions in their names.
- Select these files and click Finish.
Example: How to Modify .jrxml Report Templates
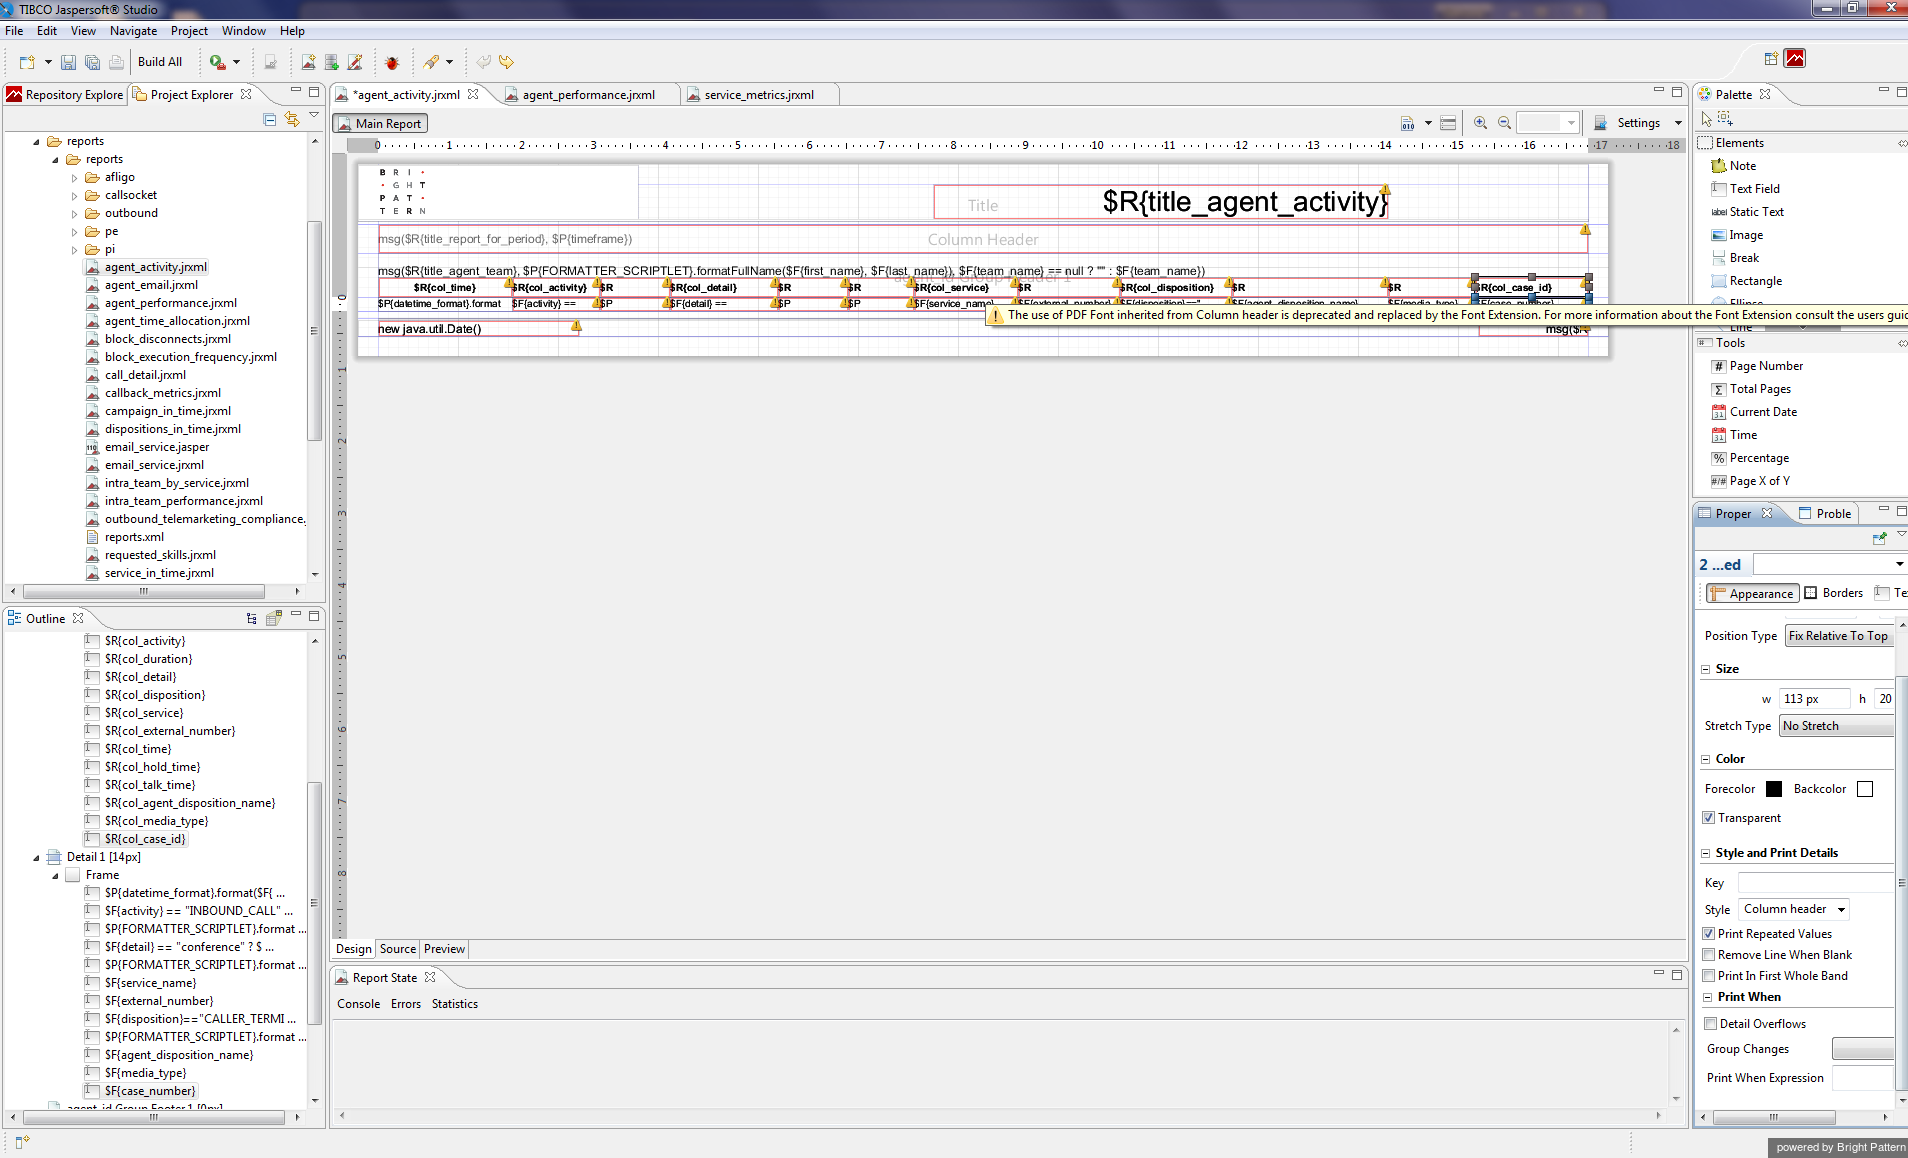
Once you have downloaded a report template, you can use the visual editor of the Jaspersoft Studio to import and modify .jrxml report templates (e.g., remove some of the existing metrics or add new ones). Report templates in the .jrxml format that are imported to Jaspersoft Studio will look as shown:
What follows is an example of how one might modify a .jrxml report template. In this example, the column Case is removed from the out-of-the-box Agent Activity Report and the formatting/visual appearance of the report is changed.
Step 1: Open file agent_activity.jrxml
- In Jaspersoft Studio, navigate to My Reports > reports.
- Find and double-click the agent_activity.jrxml file to open it.
Step 2: Select the elements you wish you change
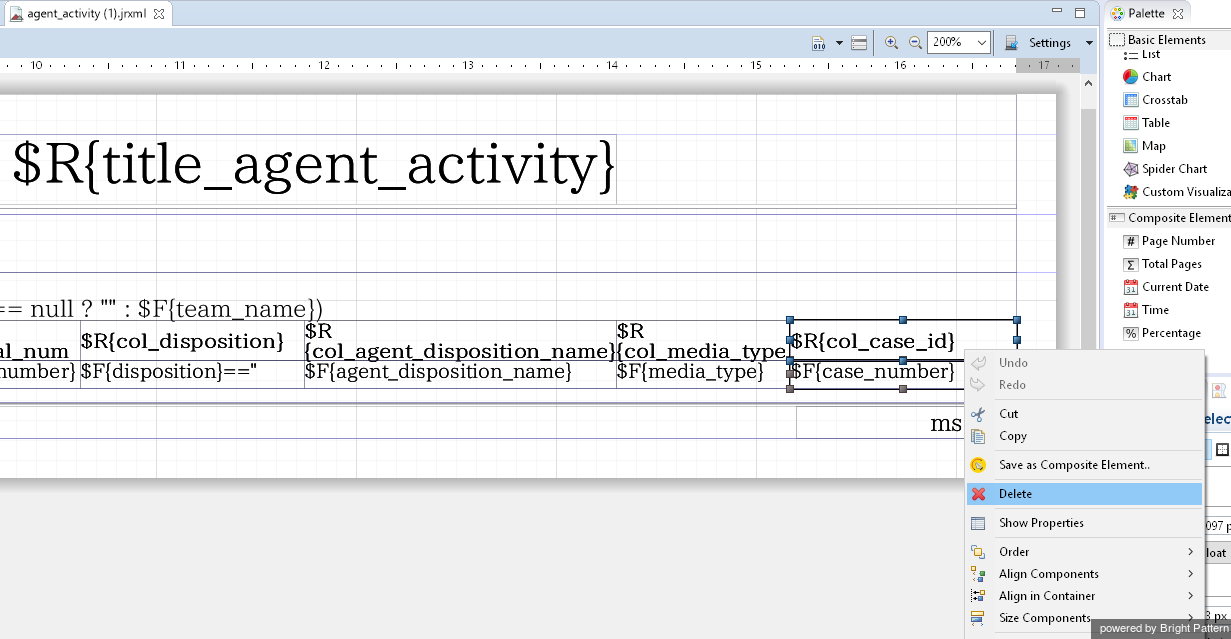
- Select elements $R{col_case_id} in the group header frame, and $F{case_number} in the detail frame of the last column. You can select both elements at the same time.
- Right-click the selected elements and select Delete to remove these elements.
Step 3: Adjust the presentation of report elements as desired
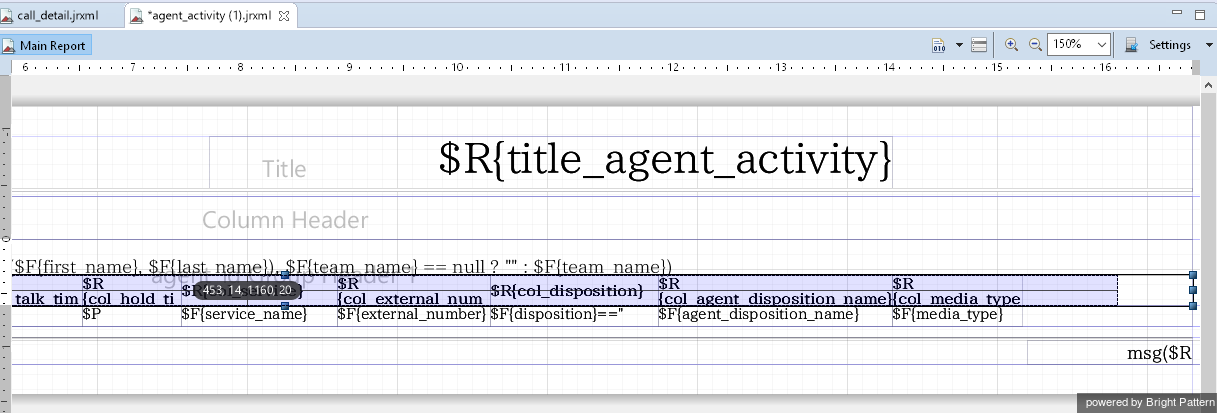
- Select the report frames and reduce their widths by dragging the elements to the right position. You can use the grid lines to help you find the edges of each element.
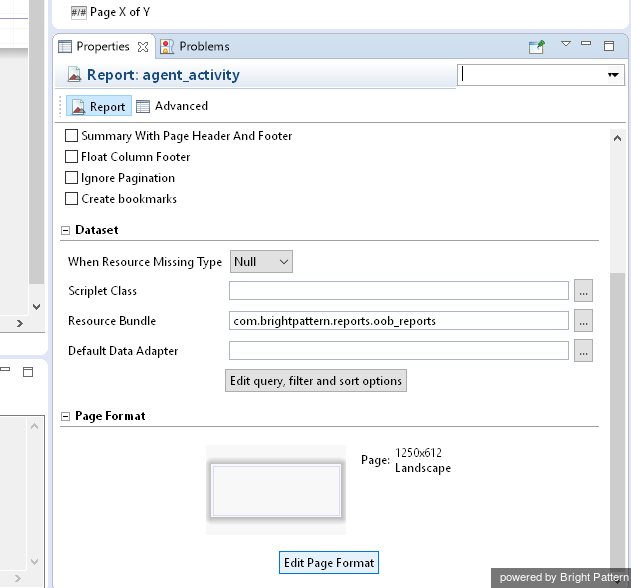
- To reduce the width of the report, click into the design view (the gray part of the screen, below the report) of the report in focus. That will bring up the Properties pane on the right-hand side of the screen.
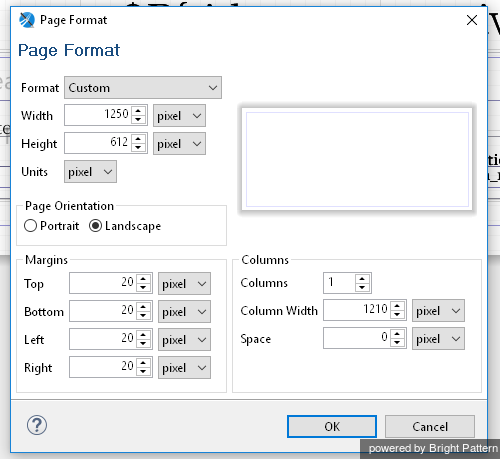
- At the bottom of Properties, select Edit Page Format. In the window that pops up, you can reduce the width of the report, as well as make other adjustments as needed.

