Contents
- Introduction
- Integration Steps
- Prerequisites
- 1 Integrated Desktop, Single Sign-On, Click-to-Call and Activity History
- Access to RightNow Data from Scenarios
Integrated Desktop, Single Sign-On, Click-to-Call and Activity History
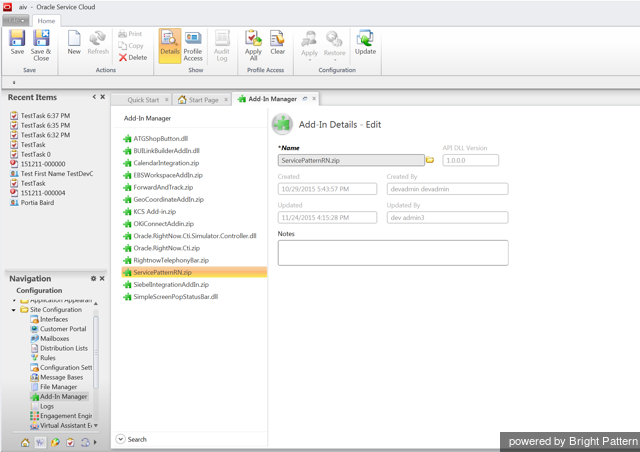
Step 1. Submit a request to the vendor for the RightNow Integration package. You will receive a .zip file titled OracleRightNow.
Step 2. Log into your RightNow application and go to Configuration > Site Configuration > Add-in Manager. Click New.
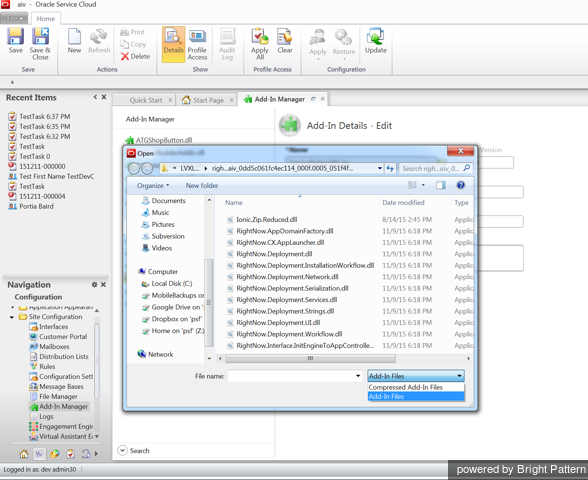
Step 3. Navigate to the location where the OracleRightNow.zip file is stored. Select the file and click Open. Click Save to confirm add-in deployment.
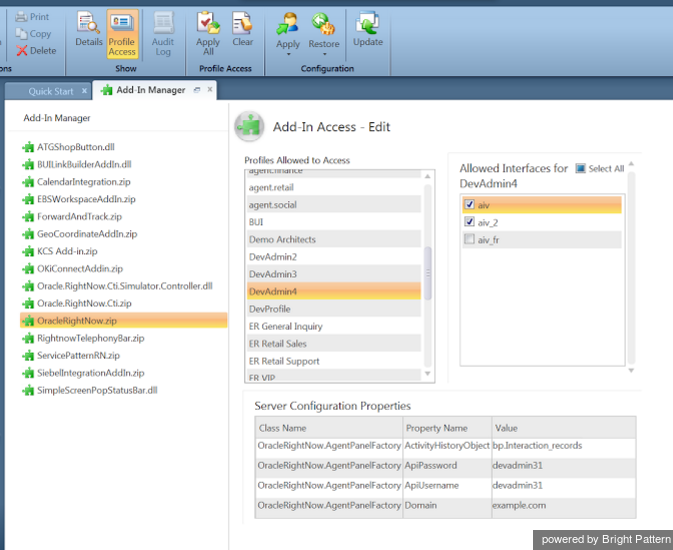
Step 4. Click Profile Access. Select one of the profiles that will use the SP integration. Within this profile, select one of the interfaces that will use the SP integration.
For the selected profile/interface combination, define the following parameters:
- ApUsername and ApPassword – Credentials of the account that will be used to create activity history objects for processed interactions. This can be any existing account with sufficient permissions to create new objects in the RightNow application.
- Domain – ServicePattern tenant access domain name. This is the domain name assigned to your contact center at the service provider level. If the domain is specified here, users of the integrated desktop will only need to enter their username and password when logging in. Otherwise, each user will have to enter the domain name manually upon first login.
- ActivityHistoryObject – The name of the custom object that will be used to record activity history for processed interactions. The custom object does not need to exist in RightNow in order to be specified here; it can be created as the next step of this integration procedure (see below). If you do not specify a custom object here, object Task will be used to record activity history.
- Note: Activity history is a collection of data related to a processed interaction, such as duration, disposition, and recording link. When object Task is used to record activity history, most of these data elements will appear in the general-purpose Notes field of the Task object. The advantage of using a custom object is that it can use a dedicated field for each data element (see below).
Step 5. If necessary, repeat step 4 for other combinations of profiles and interfaces.
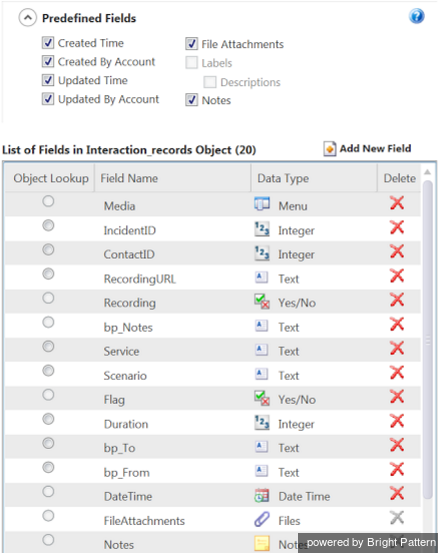
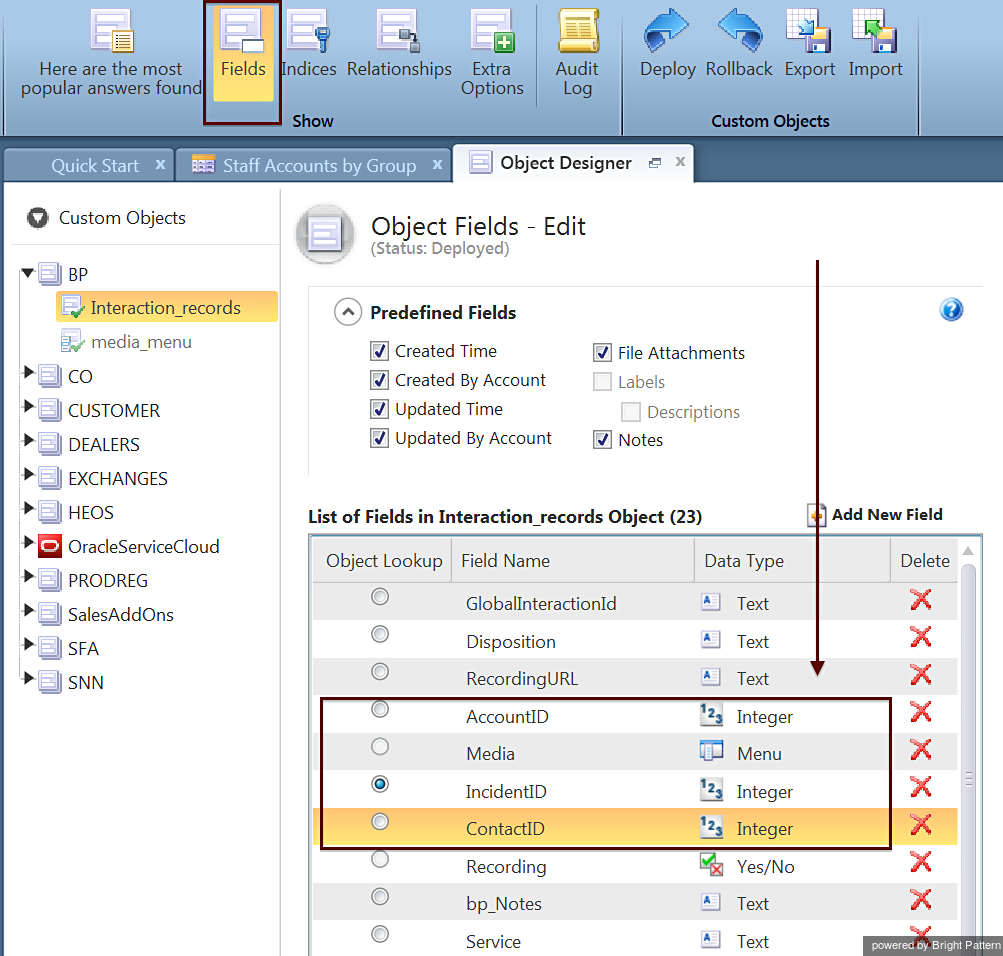
Step 6. If you set the ActivityHistoryObject to a custom object in the previous step, open the Object Designer and create a custom object with the same name. Select the Predefined Fields and create custom fields for this object setting their names and types exactly as shown in the screenshot below.
Note that the ID field name (shown at the bottom of the previous screenshot) has data type Integer. You must specify the the data type.
As such, the following ID fields' data type must also be set to Integer:
- AccountID
- ContactID
- IncidentID
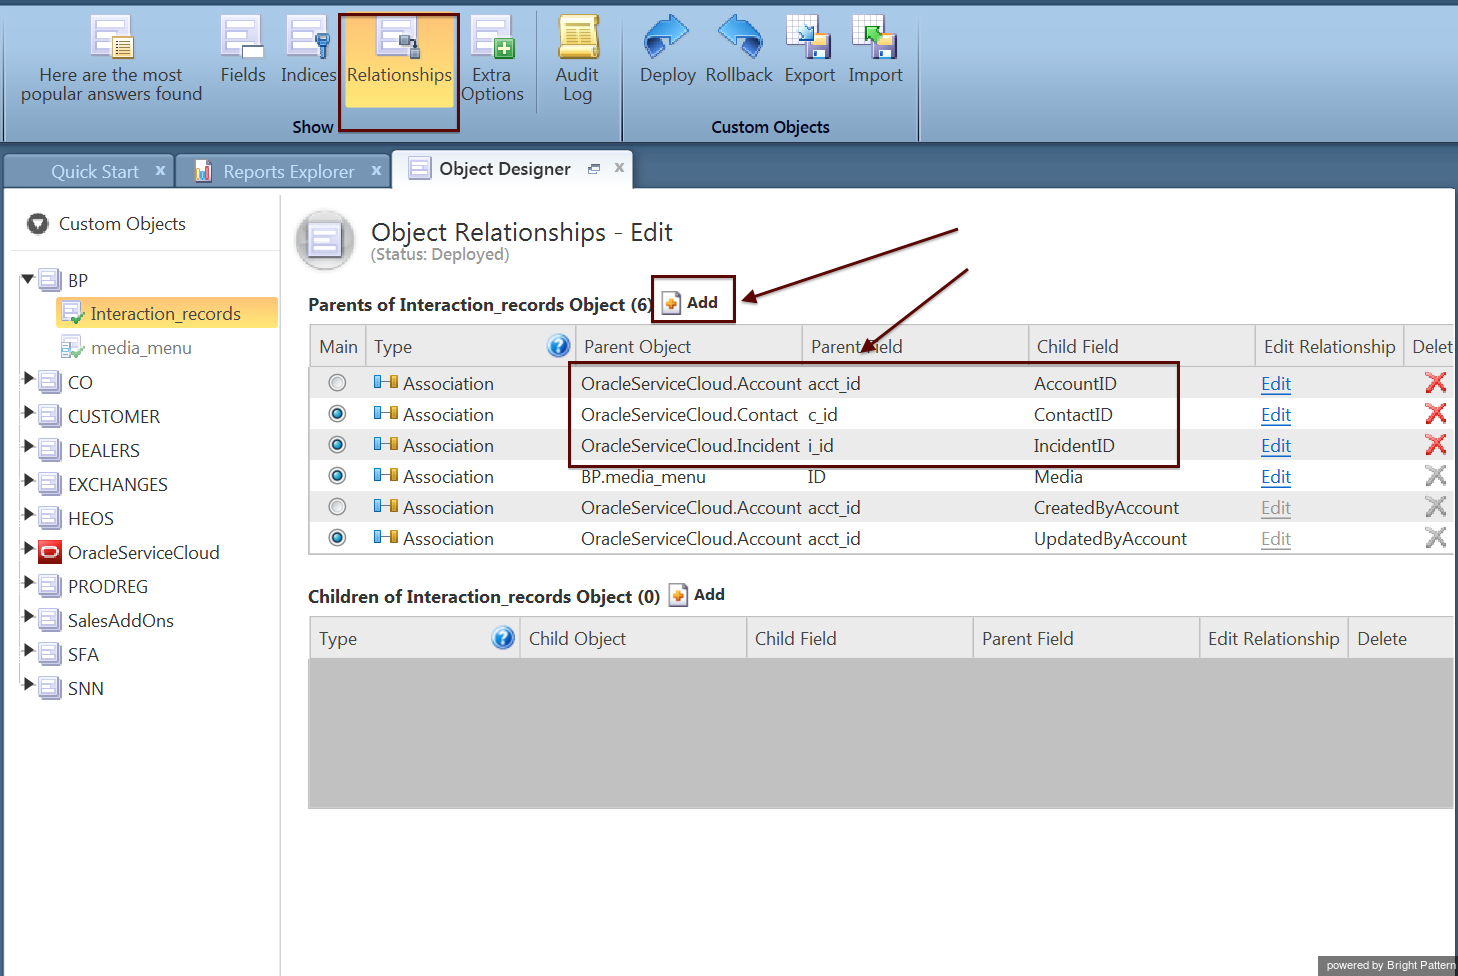
Then specify the applicable relationships for all of the ID fields (AccountID, ContactID, and IncidentID).
- Navigate to Relationships.
- From the Custom Objects menu (on the left), select the custom object whose relationships you are modifying. The Object Relationships properties and a list of interaction records parents will be shown.
- Click the Add icon
 to specify the associations with accounts, incidents, and contacts by ID field type.
 - Click Apply to save your changes.
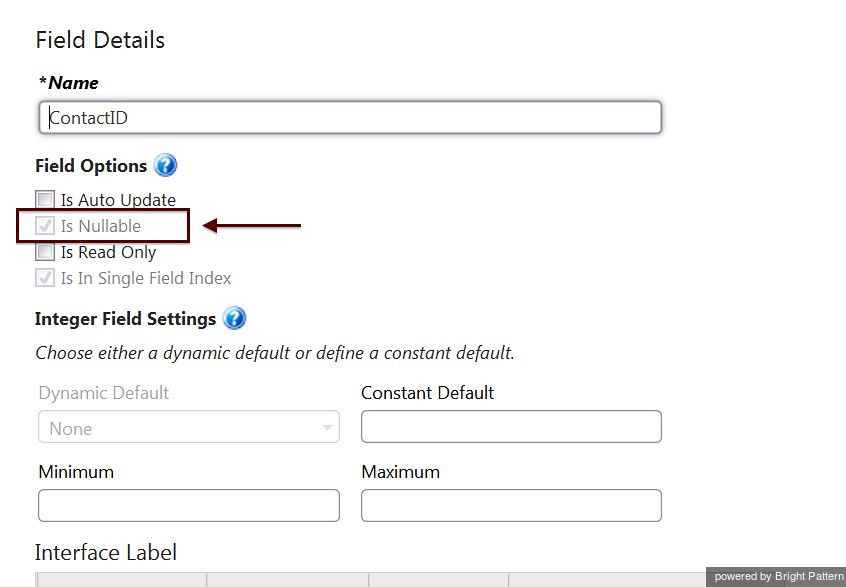
Navigate back to Fields. If the attribute is enabled, the Field Options for all field names should be nullable.
How to make the fields nullable:
- Select the desired Field Name from the list of fields. The field properties will be shown on the Field Details panel.
- Under Field Options, check the box for Is Nullable.
- Click Apply to save your changes.
After you have deployed the modified custom object, you should log out and log in to the RightNow application.
Step 7. If you defined a custom object for activity history, use the RightNow Workspace Designer to create a new tab for objects Incident and Contact where the associated activity history records will appear.
Step 8. This step is only necessary if you are planning to implement single sign-on, i.e., simultaneous logging of your users into both RightNow and ServicePattern environments.
To support single sign-on:
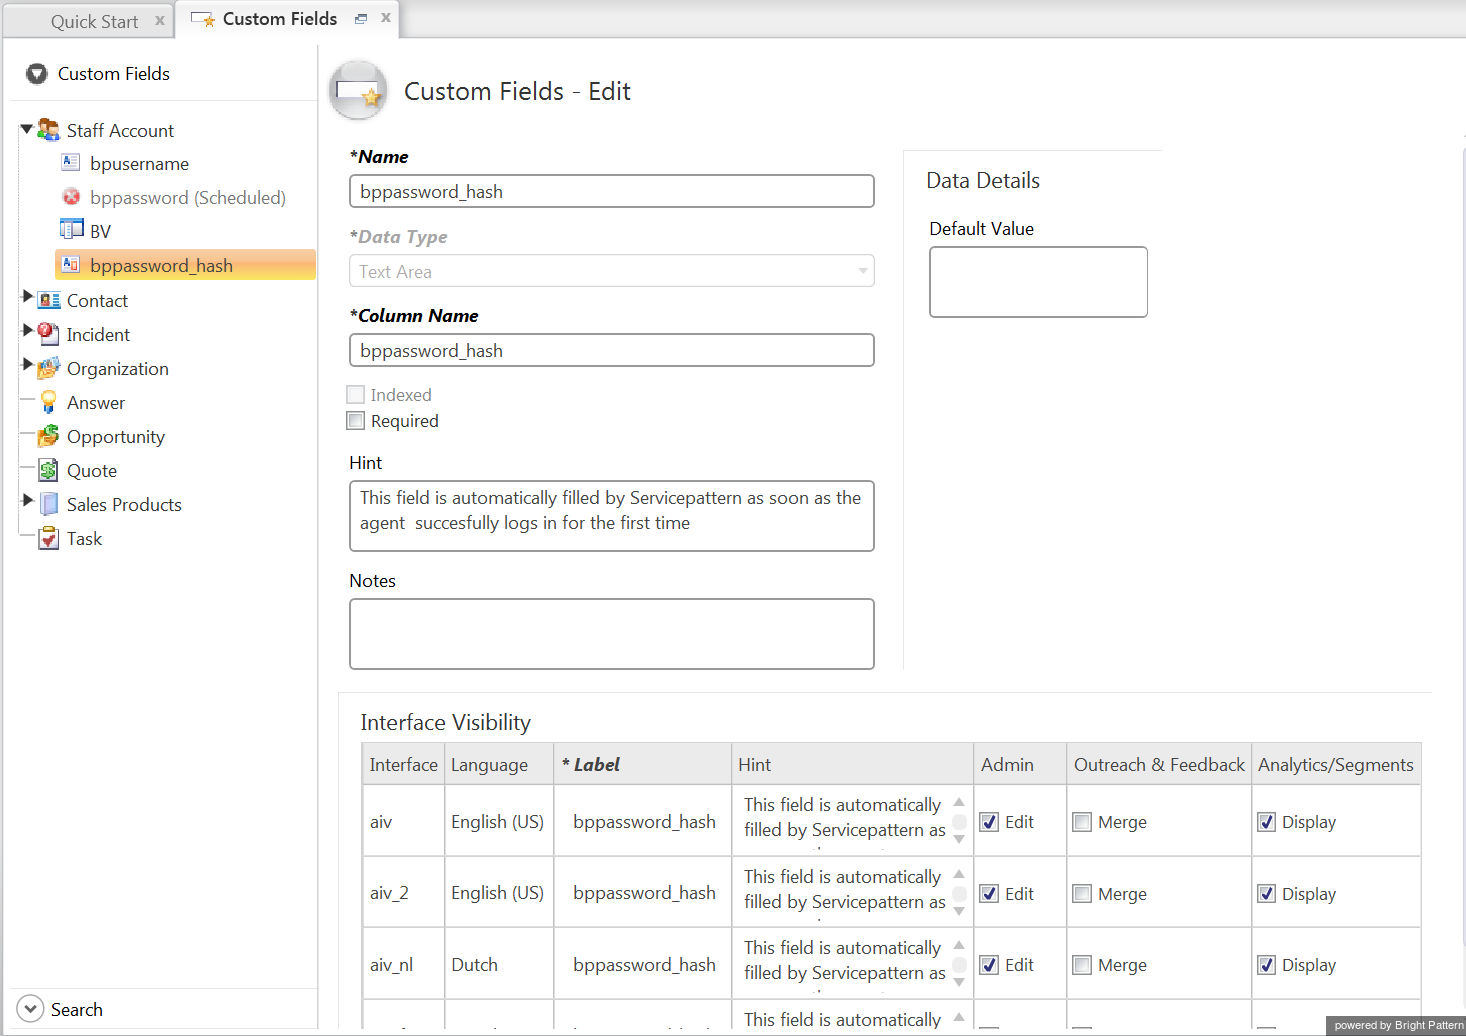
- navigate to Configuration > Database > Custom Fields
- select Staff Account
- create these custom fields:
- bpusername field of the Text Field type
- bppassword_hash field of the Text Area type
- Note: Single sign-on works in the following way: When a user logs into the integrated environment for the first time, he will log into the RightNow application first and will then be presented with the ServicePattern Agent Desktop Login screen (see steps 12 and 13 below). Upon successful login, his ServicePattern username and password will be remembered in the RightNow application, so that the next time this user logs into RightNow he will be automatically logged into the ServicePattern Agent Desktop as well. Note that the user may have to re-supply his login credentials from time to time in case his ServicePattern password is set to expire according to the security practices of your contact center.
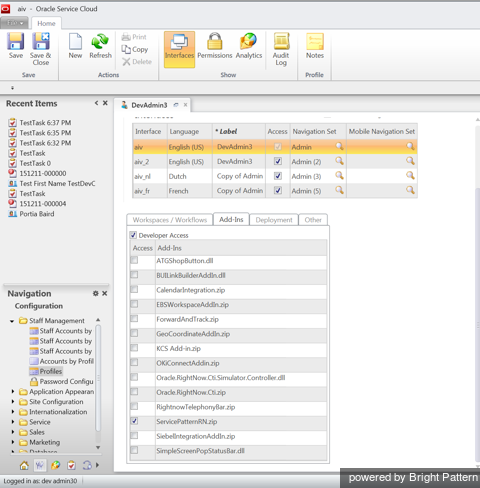
Step 9. Go to Staff Management > Profiles. Select the profile of the users who will be using the integrated desktop in your organization (e.g., agents). Open this profile and click the Add-ins tab.
Step 10. Select the ServicePattern Add-in checkbox. Save the configuration changes. This enables the integrated desktop for users with the selected profile. If necessary, repeat the procedure for other profiles. Log out of the RightNow application.
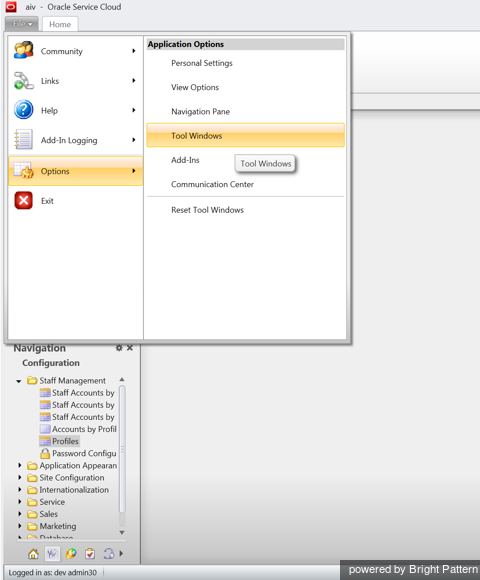
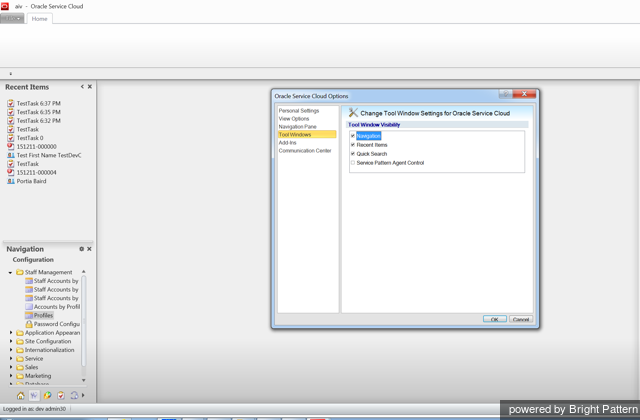
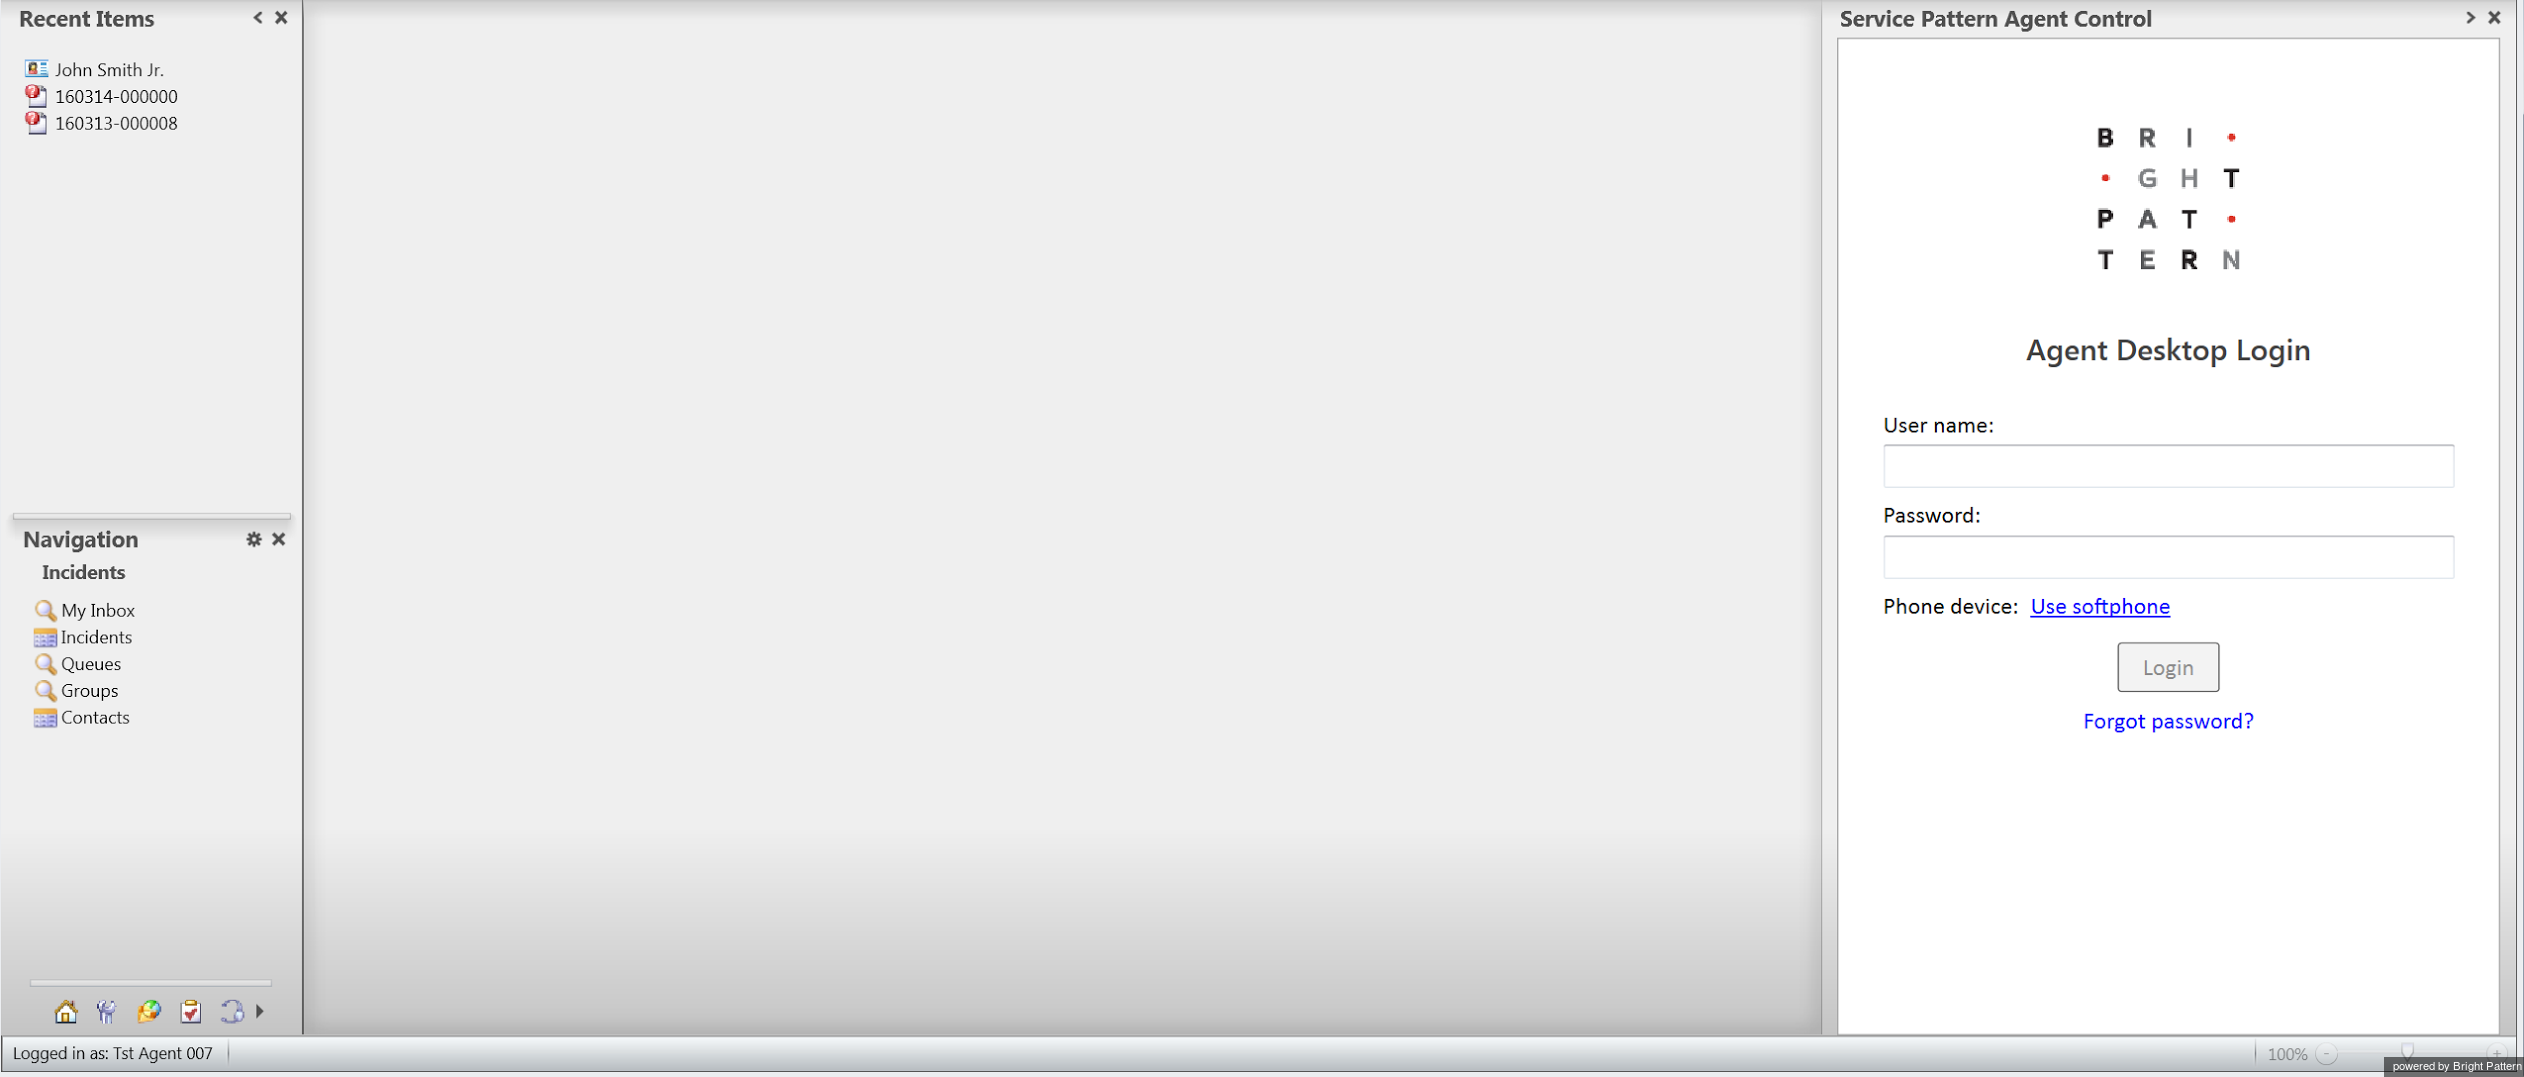
Step 11. Log into the RightNow application again. Make sure you log in with one of the profiles for which the integrated desktop was enabled during the previous step. Go to File > Options > Tool Windows. Select ServicePattern Agent Control and click OK. The Agent Desktop login window will open. Drag this window to the right part of your RightNow desktop – it will become a widget within the RightNow application.
- Note: This step has to be repeated on computers of all other RightNow users who need access to the integrated desktop (see the last step of this section).
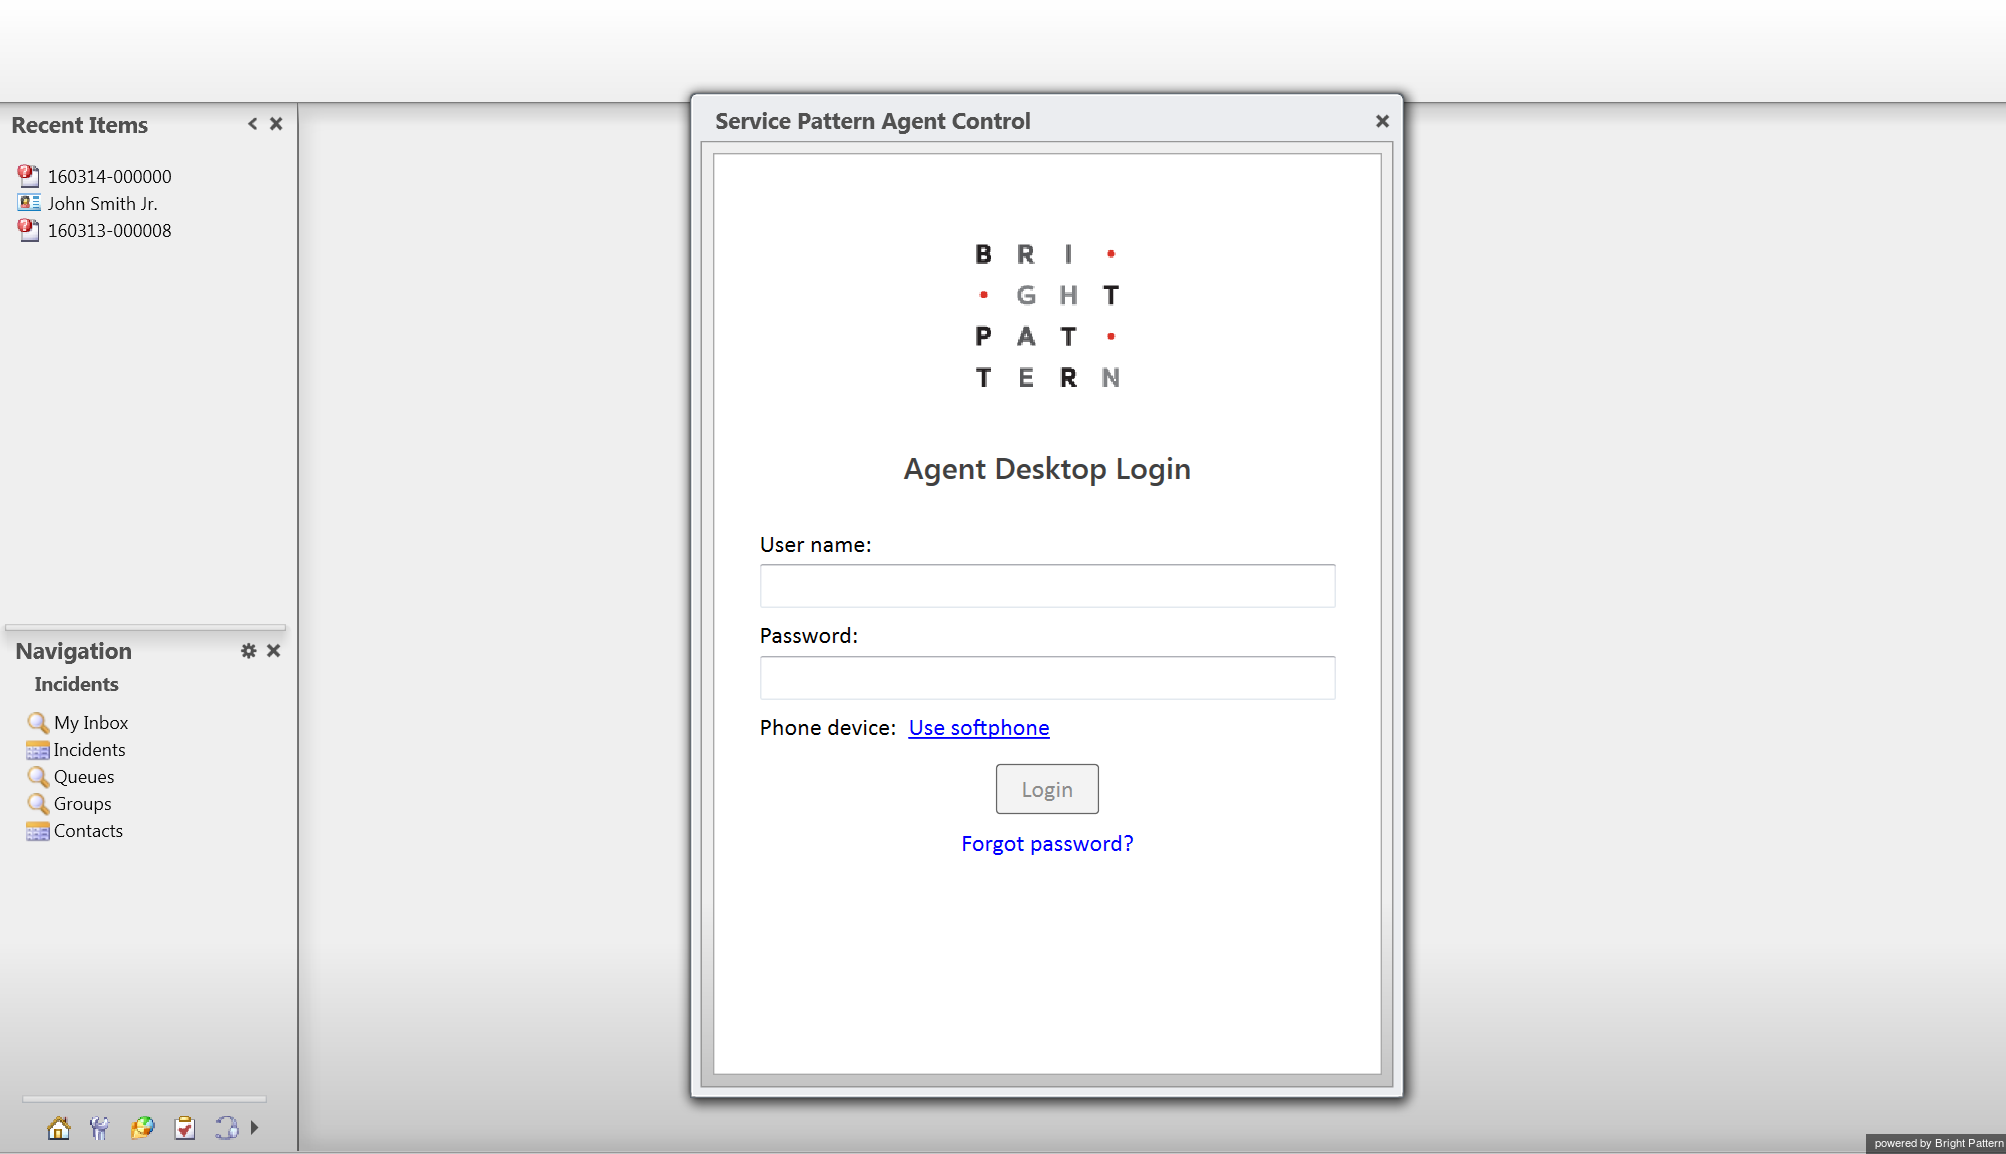
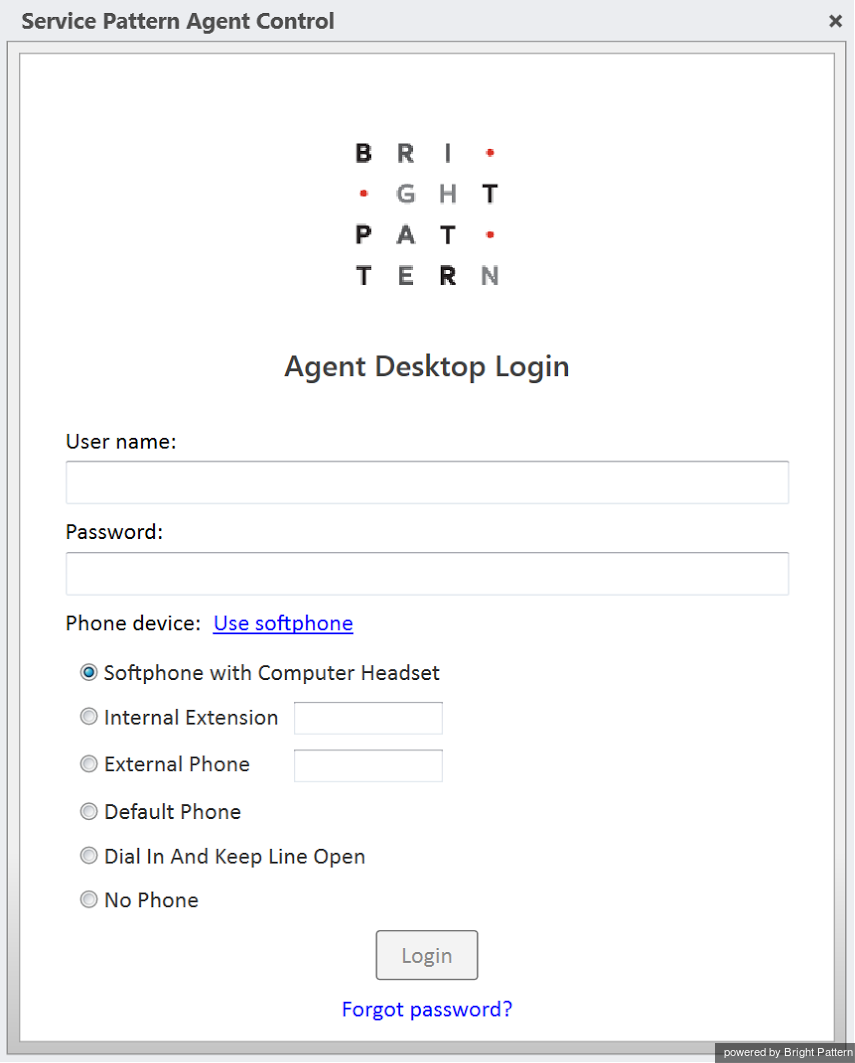
Step 12. Enter your ServicePattern credentials. If you configured the Domain property in step 4 above, you will only have to enter your username and password on the login screen. Otherwise, you will also see and have to specify the Domain field for your initial login. Use the domain name assigned to your contact center at the service provider level.
By default, you login with a softphone. To choose another device, click the current Phone device setting and select the desired type of device from the menu that appears below. For more information about the available device options, see section Selecting a Phone Device of the ServicePattern Agent Guide.
Step 13. Click the Login button. Note that if this is your first login into ServicePattern on the given computer, you will be prompted to install the Agent Desktop Helper Application.
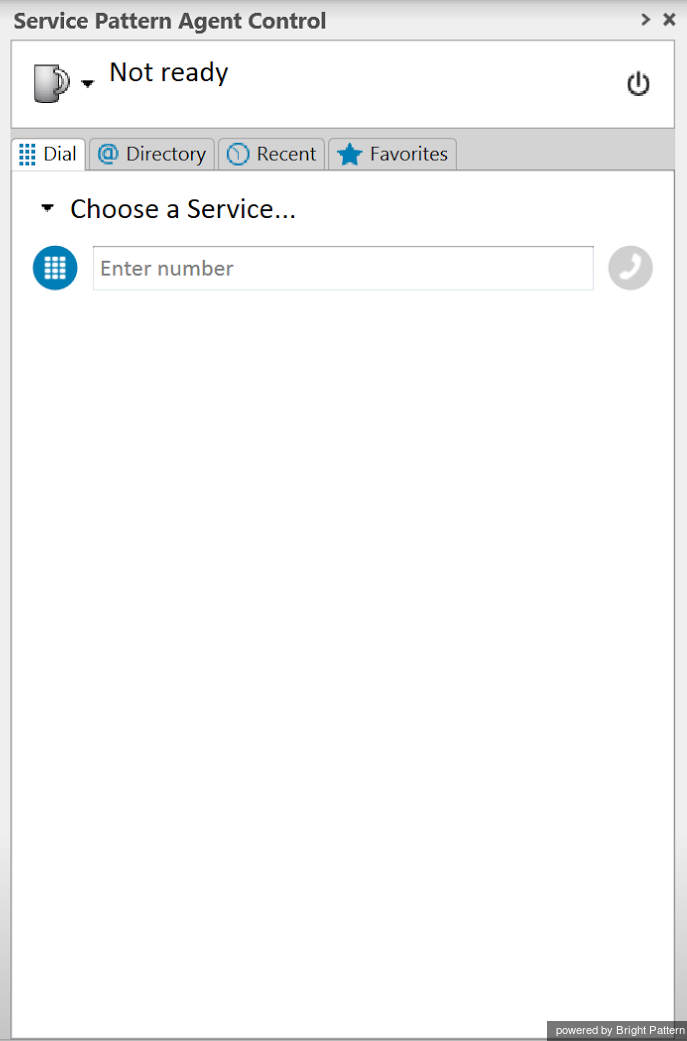
The ServicePattern Agent Desktop widget will now show a standard set of tabs and controls available to a contact center agent. For more information about the Agent Desktop tabs and controls see ServicePattern Agent Guide. Note that the appearance and location of these controls has been modified to match the overall look and feel of the RightNow application.
Step 14. To test the click-to-call function, select a RightNow contact. (For subsequent tests, it is essential that there is at least one incident associated with this contact in the system.)
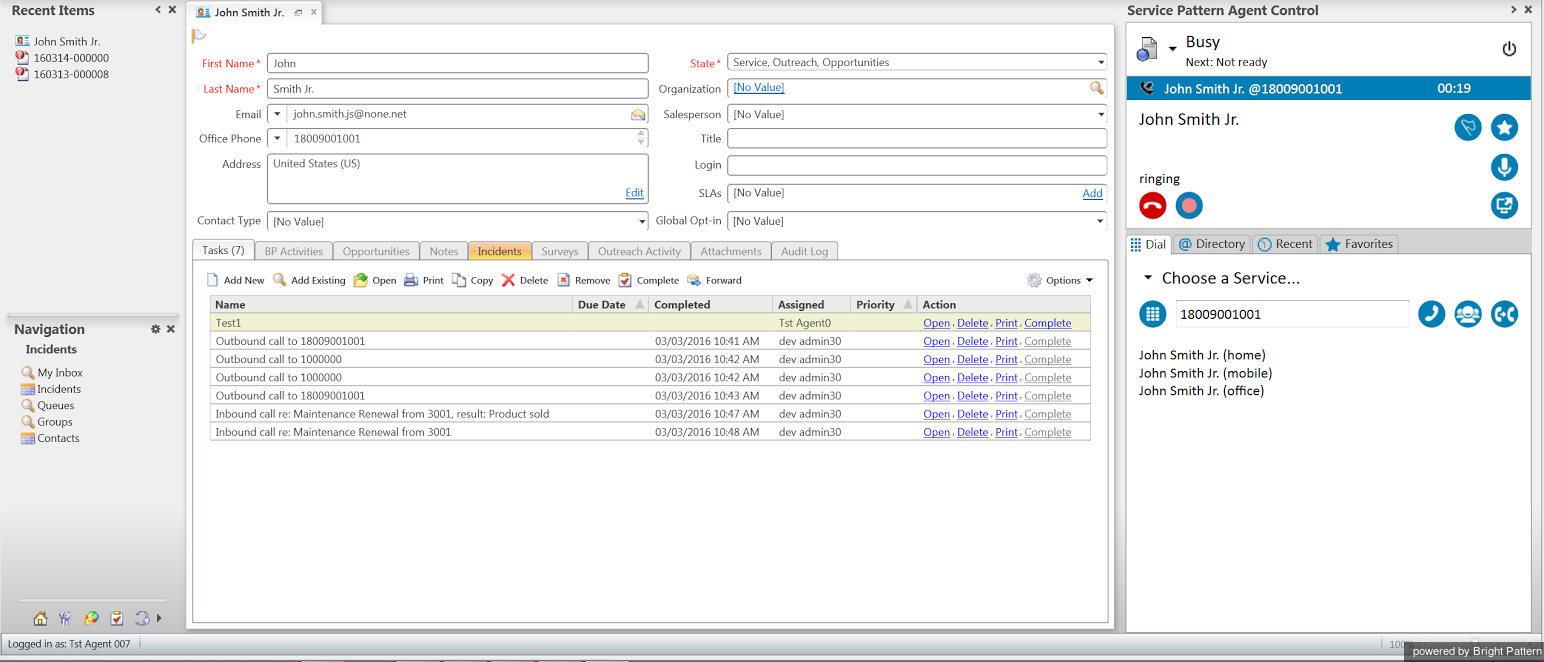
All phones of this contact will appear in the Dial Pad tab of the Agent Desktop widget. Hover a phone that can be used for testing; a click-to-call icon will appear next to it. If you click the icon, a call to this phone will be placed immediately. If you click the phone, the number will appear in the number input field above. You can dial this number by clicking the Initiate call button next to this field.
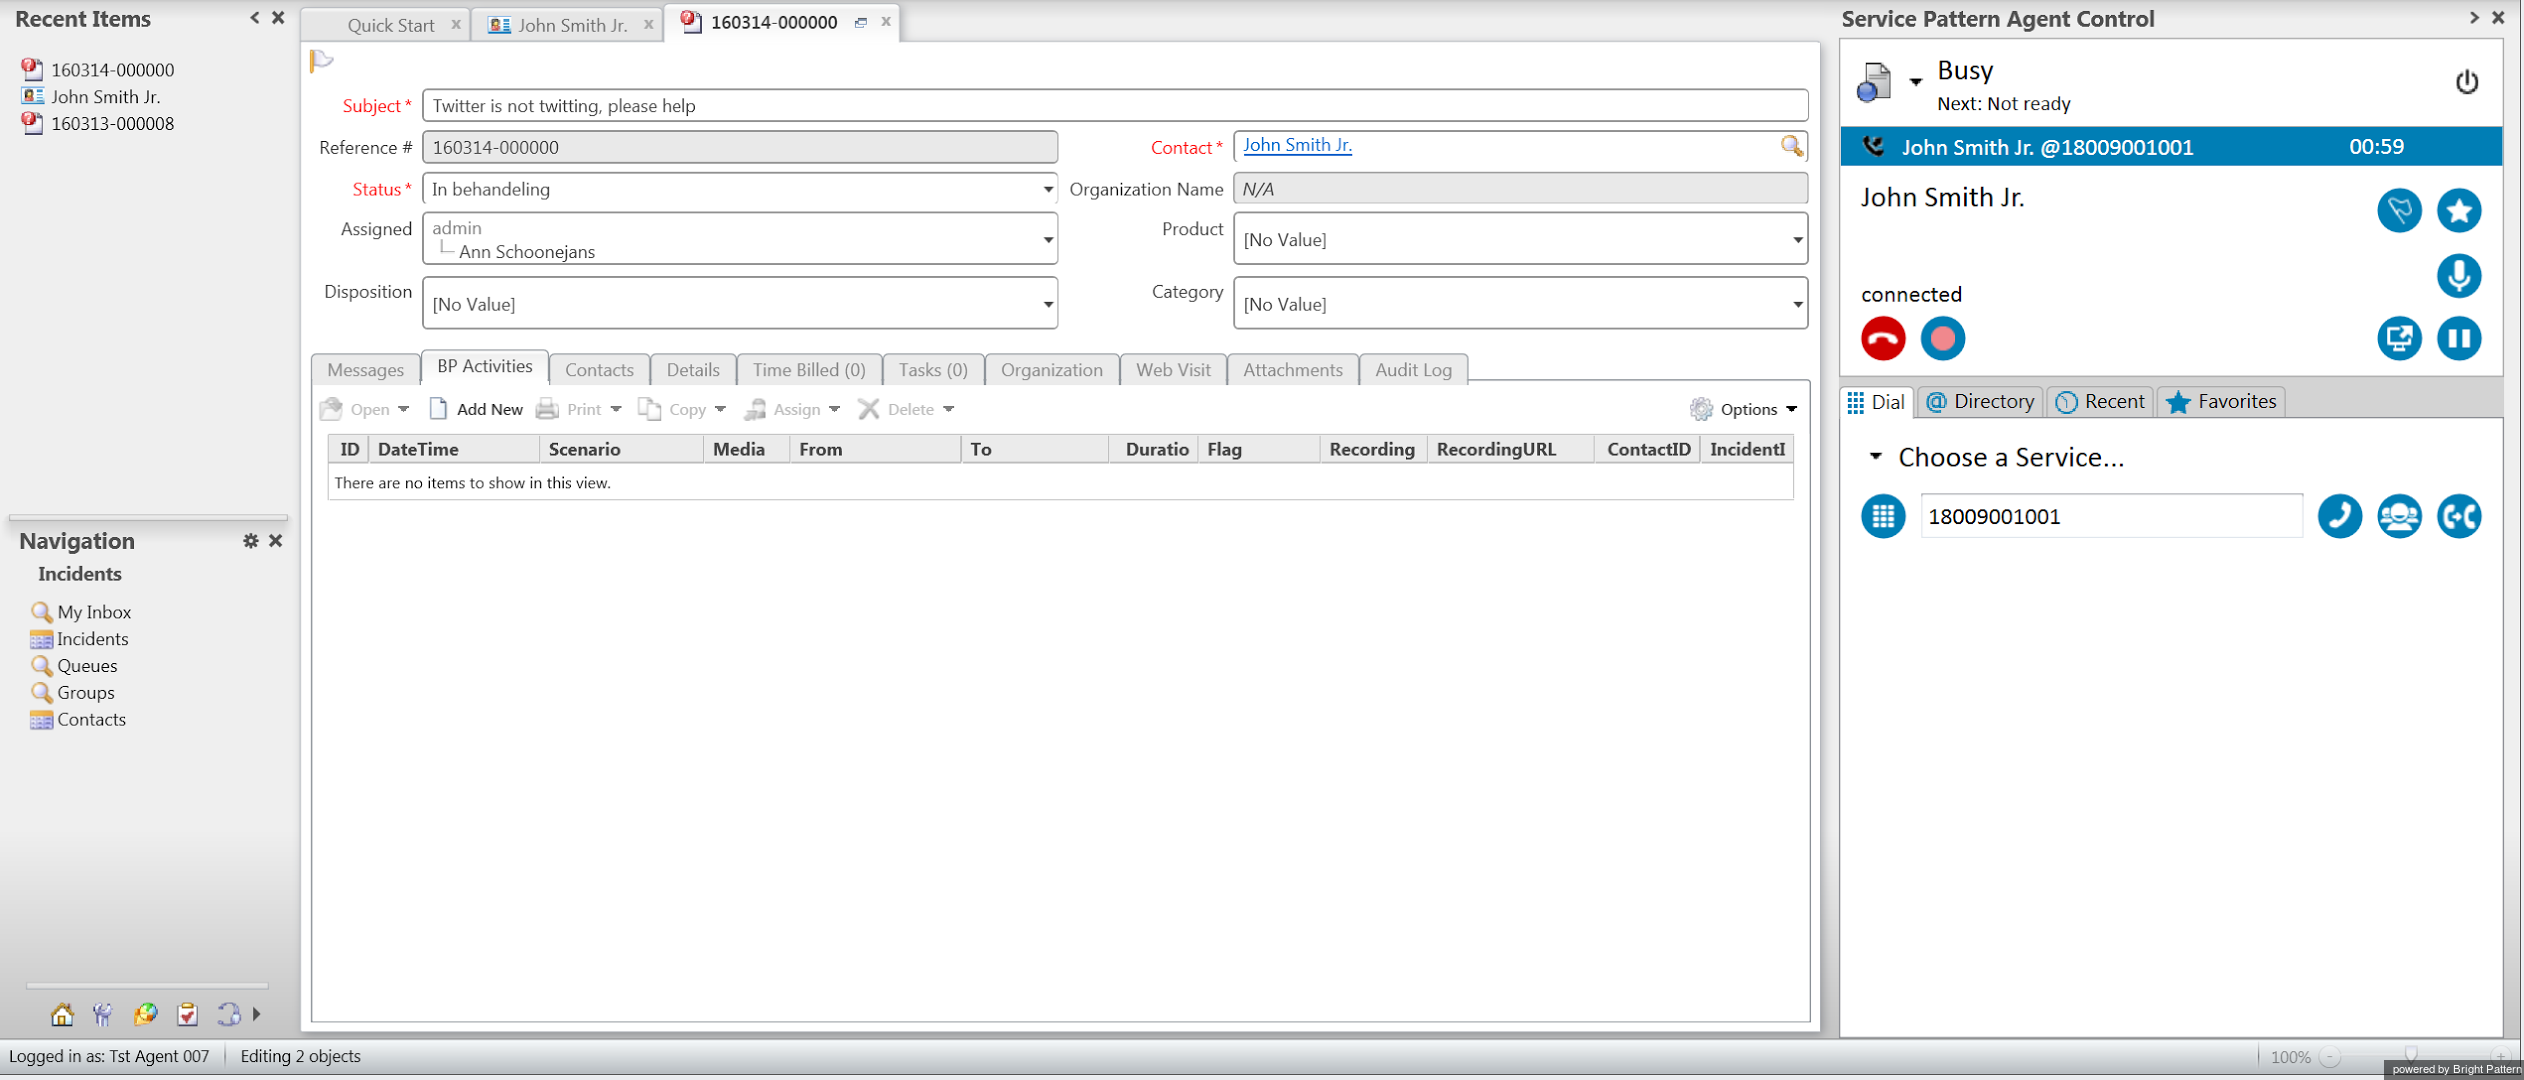
When the call is answered, you should have all of the call control functions available to you via the integrated ServicePattern Agent Desktop Window (e.g., mute, hold, transfer, release). For more information, see ServicePattern Agent Guide. The screenshot below shows the integrated desktop with a RightNow contact and a connected call in the Agent Desktop widget.
Note the following:
- If you make a call to another integrated desktop user, clicking the Send screen button
 will display your currently open RightNow record to that user.
 - If you transfer the call to another integrated desktop user, the RightNow record that was open on your desktop at that time will be displayed to that user.
- If you make a conference with another integrated desktop user, the RightNow record that was open on your desktop at that time will be displayed for that user.
Step 15. While still on the test call, select an incident associated with the above contact.
While you are on the call, note the basic interaction facts, including approximate start time, duration (talk + hold time), the number called, and disposition if any. These data elements will be used to test the activity history function in the next step.
Release the call, click Complete to finish the after-call work, and close the incident.
Step 16. Interaction activity history is created upon completion of an interaction and is recorded into the object configured in steps 4 and 5.
Interaction activity history is associated with the Incident or Contact that was present on the desktop at the end of the interaction processing. If no such object was present, activity history will be recorded without any associations.
To test activity history, open the incident again that you worked with during the previous step.
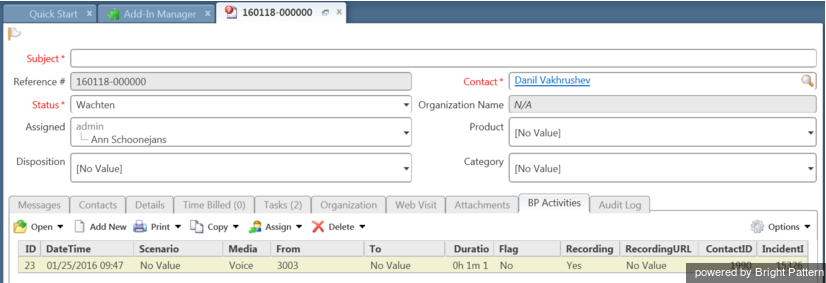
- If you configured a custom object for activity history, click the tab corresponding to that object. The data shall appear as the most recent record, in the fields that you defined in step 6.
- If you did not configure a custom object, click the Tasks tab and open the most recent task from the list. Most of the activity history data shall appear in the Notes field.
Review the activity history data and make sure it corresponds to the properties of the interaction that you completed in the previous step.
- Note: Activity history can be edited manually by the users who have corresponding permissions.
Step 17. If you configured single sign-on in the optional step 8, log out of the RightNow application, wait 30 seconds, and log into it again.
You should be logged in to both RightNow and ServicePattern systems simultaneously, i.e., the Agent Desktop widget should bypass the ServicePattern login screen and immediately show the telephony controls.
Step 18. To enable integrated desktop for other users of your system, activate the ServicePattern Add-in on their computers (see step 11 above). Also make sure that these users have:
- one of the RightNow profiles for which the integrated desktop was enabled during the previous steps
- a user account in ServicePattern with access to all regular agent functions
- the Use RightNow privilege

