Contents
- Introduction
- Access to Reports and Records
- General Information About Access to Reports and Records
- Report Generation
- Interaction Records Search
- List of Interaction Records Search Criteria
- Global Interaction Identifier
- Agent Activity Search
- Quality Management
- General Information About Quality Management
- Call Recordings
- 1 Chat Transcripts
- Email Messages
- Screen Recordings
- Detail Reports
- Aggregate Reports
- General Information About Aggregate Reports
- Agent Performance Report
- Agent Time Allocation Report
- Intra-Team by Service Report
- Intra-Team Performance Report
- Team Operation Quality Report
- Team Performance Report
- Scenario Block Disconnects Report
- Scenario Block Frequency Report
- Requested Skills Report
- Service in Time Report
- Service Metrics Report
- Service Staffing and Overflow Report
- Virtual Queue (Callback) Report
- Campaign in Time Report
- Dispositions in Time Report
- Telemarketing Compliance Report
- Email Service Report
- Agent Email Report
- Team Email Report
- Concurrent Users Report
- Carrier Usage
- Campaign Results
- Recordings Details
Chat Transcripts
To view chat transcripts, you must search the interaction records available in Reports (make sure you are not still in Configuration).
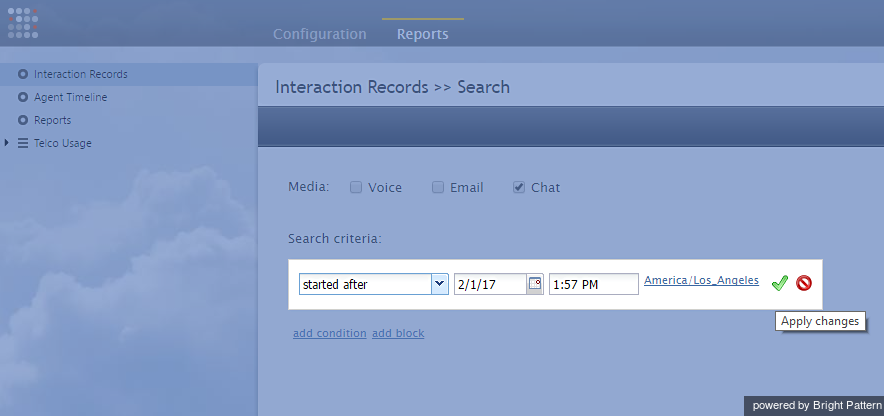
- Navigate to Reports > Interaction Records > Search.
- Click the box for Chat, and specify the date range for the transcripts you wish to view.
- Click the check mark to apply your changes.
- Click the Search icon
 .
.
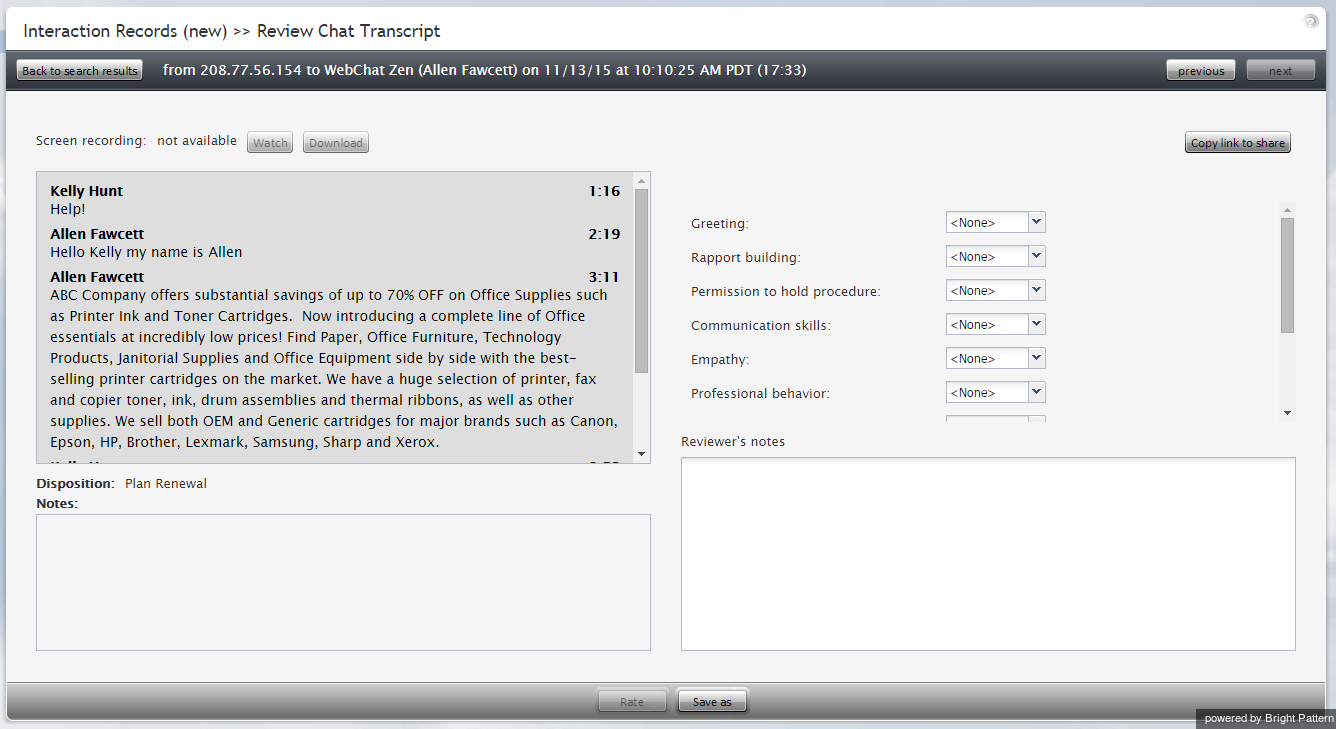
To review a chat transcript, click the messaging icon for the corresponding interaction record. The Review Chat Transcript page will open with a complete chat transcript and grade controls.
If any categories for agent performance evaluation have been defined in your contact center configuration, you can grade the agent performance during the selected chat interaction on a scale of one to ten in any of those categories. You can also enter some free-form comments about this transcript.
Click the Rate button to save the data you have entered. Your grades and comments for this chat interaction will be stored and available to other users who may subsequently review this call record.
Note that the same transcript is provided for all chat segments, but you can grade performance of each agent who handled the chat separately. Use the next and previous buttons to navigate between segments.
Exporting Chat Transcripts
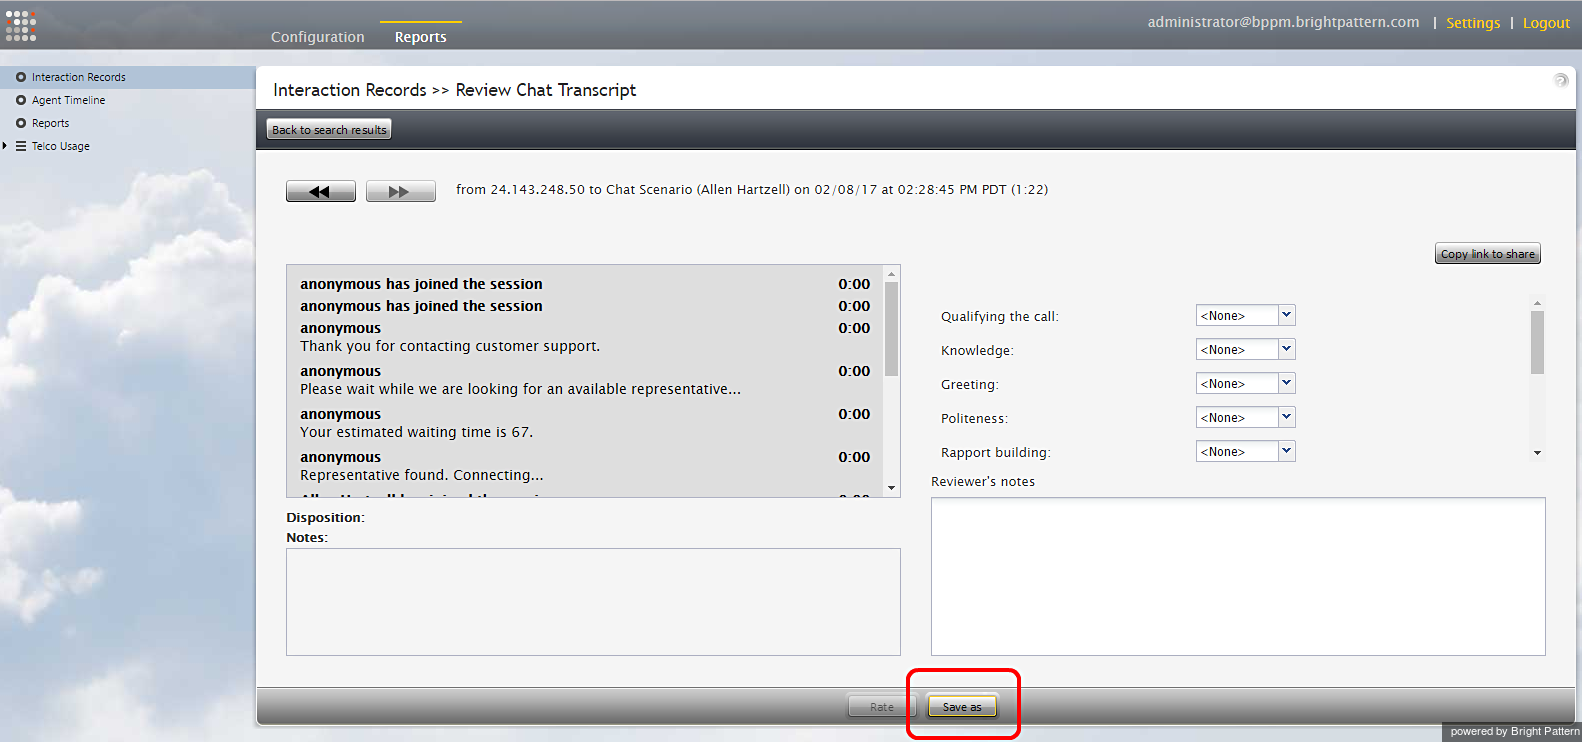
To download the grades, reviewer’s notes, and the transcript to your computer, click the Save as icon ![]() .
.
To share a link to the chat transcript with other reviewers, click the Copy link to share icon ![]() . The link to this page will be copied to the clipboard. You can then paste this link to an email or text message to other people in your organization. Note that in order to access the transcript, these people must have the privilege Listen to call recordings and chat transcripts.
. The link to this page will be copied to the clipboard. You can then paste this link to an email or text message to other people in your organization. Note that in order to access the transcript, these people must have the privilege Listen to call recordings and chat transcripts.
Emailing Chat Transcripts to Customers
Starting with version 13.3, a chat scenario can be configured to email a "human-readable" chat transcript to a customer. This capability extends the usefulness of chat transcripts beyond the reach of administrators working in the Contact Center Administrator, directly to the customer, by giving the customer the means to request an email copy of the transcript when the conversation is over. This functionality is set up and managed in the Scenario Builder using the variables $(item.transcript.text) and $(item.transcript.html).
How to Set up the Chat Scenario
In this example, the chat scenario will include the following actions:
- The customer initiates a chat.
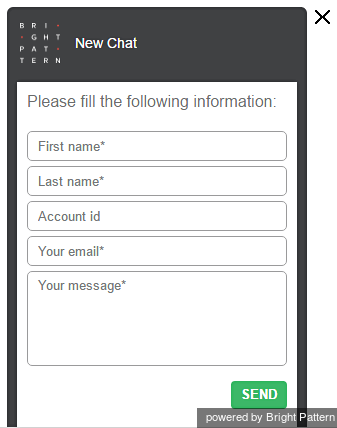
- The Request input form asks the customer to provide last name, first name, full name, email address and the message to the company.
- Find Agent is deployed. If the agent accepts the chat, Connect Chat is enabled and the conversation begins.
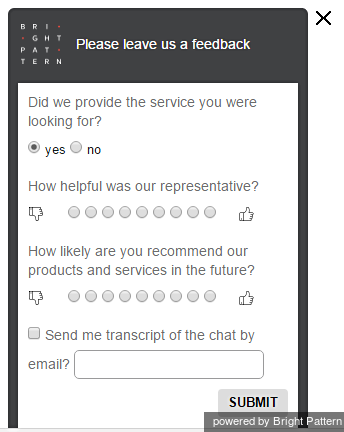
- The conversation ends and Mobile Chat Survey is deployed. In this survey, the customer is asked to provide an email address if the customer wants a copy of the chat transcript to be emailed.
- The chat window closes.
Set up your chat scenario exactly as in the steps that follow.
Step 1
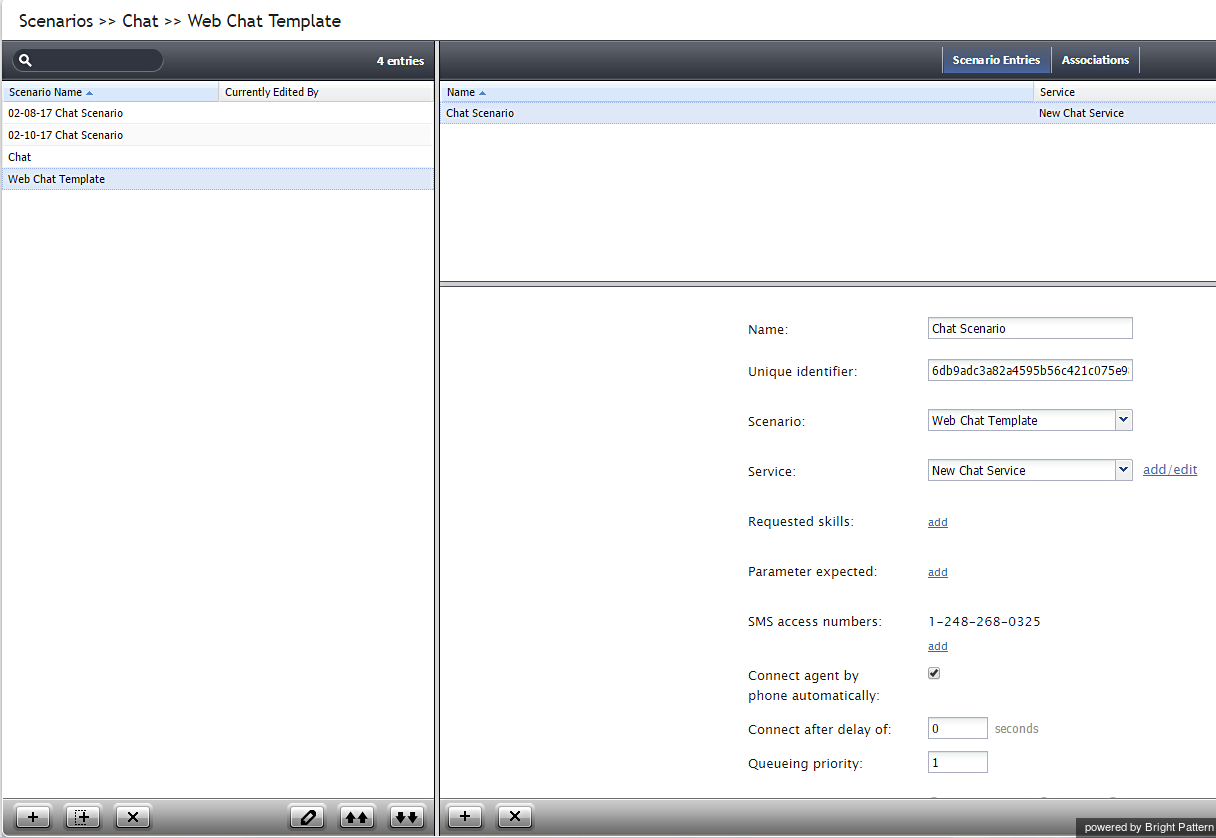
Navigate to Configuration > Scenarios > Chat and select the web chat scenario you wish to edit. If you do not already have a web chat scenario set up, you should create one or use a template to create one. Note that a web chat scenario is not the same as a mobile chat scenario.
Step 2
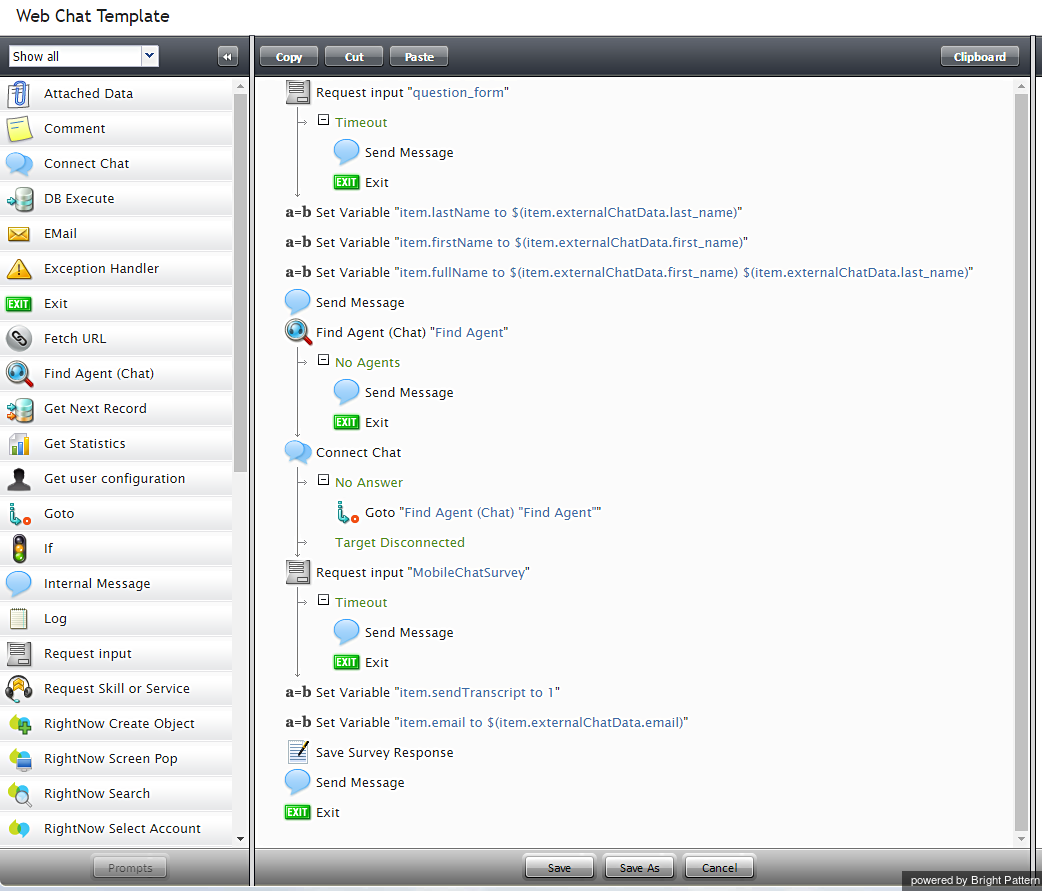
Click the Edit icon ![]() to edit the scenario in the Scenario Builder. The Scenario Builder will open in a separate tab or window, and your Web Chat Template scenario will appear. You should make your scenario match the scenario shown.
to edit the scenario in the Scenario Builder. The Scenario Builder will open in a separate tab or window, and your Web Chat Template scenario will appear. You should make your scenario match the scenario shown.
Step 3
Notice that the scenario begins with a Request input block that asks the customer fill out a form with first name, last name, and first name plus last name. These fields are included on the form using three Set Variable blocks. Drag each Set Variable block onto the scenario and place them all underneath the Request Input block.
When the customer initiates a chat, the customer will see the form in the chat window.
Step 4
Set the variable properties on the right panel of the screen, filling in the fields for Variable name and Value.
The properties should be set as follows:
| Variable name | Value | Description |
|---|---|---|
| item.lastName | $(item.externalChatData.last_name) | customer's last name |
| item.firstName | $(item.externalChatData.first_name) | customer's first name |
| item.fullName | $(item.externalChatData.first_name) $(item.externalChatData.last_name) | customer's full name |
Step 5
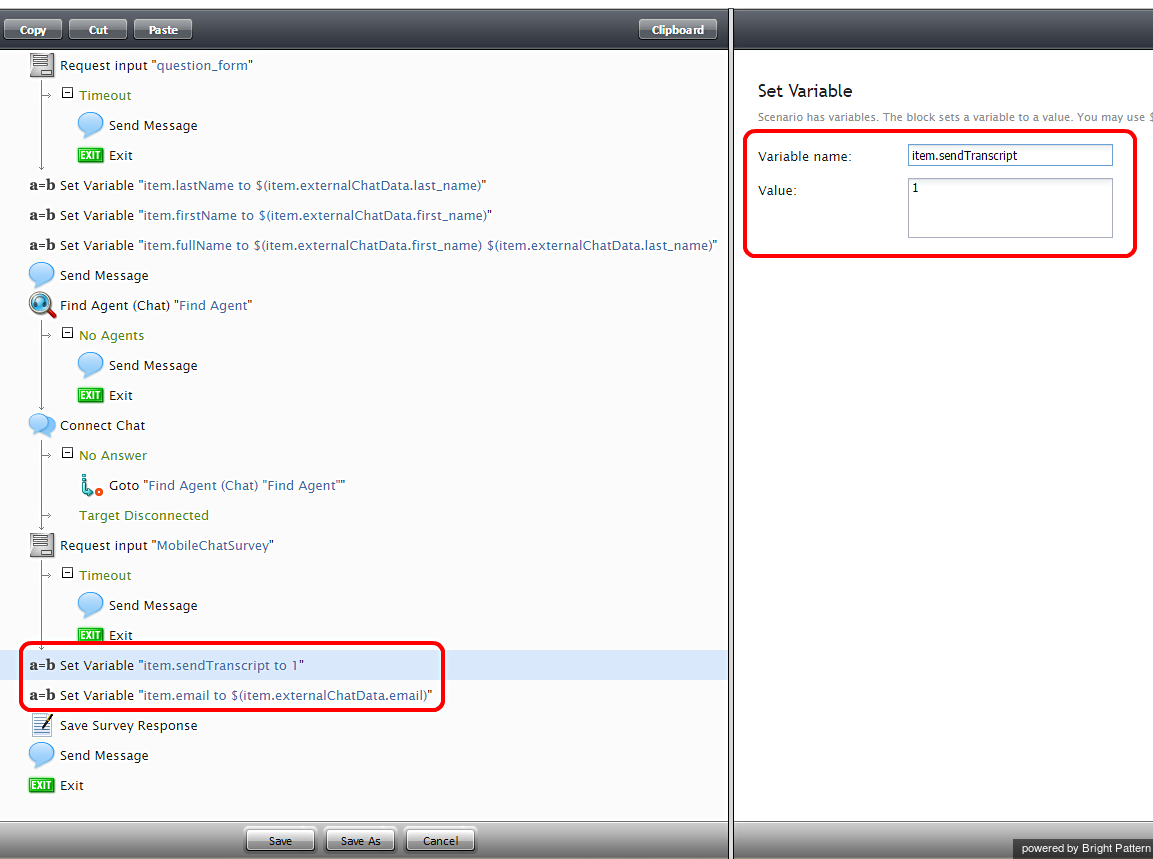
Drag two more Set Variable blocks onto the scenario underneath the last Request input block.
The properties should be set as follows:
| Variable name | Value | Description |
|---|---|---|
| item.sendTranscript | 1 | The functionality to send the chat transcript is turned on. |
| item.email | $(item.externalChatData.email) | customer's email address |
Note that $(item.sendTranscript) value must be set to 1 in the scenario for the chat transcript to be sent. If you set the value to zero or you leave it blank, the transcript will not be sent. Furthermore, the customer must provide an email address for the transcript to be sent.
Save your changes. Close the Scenario Builder window or tab.
Step 6
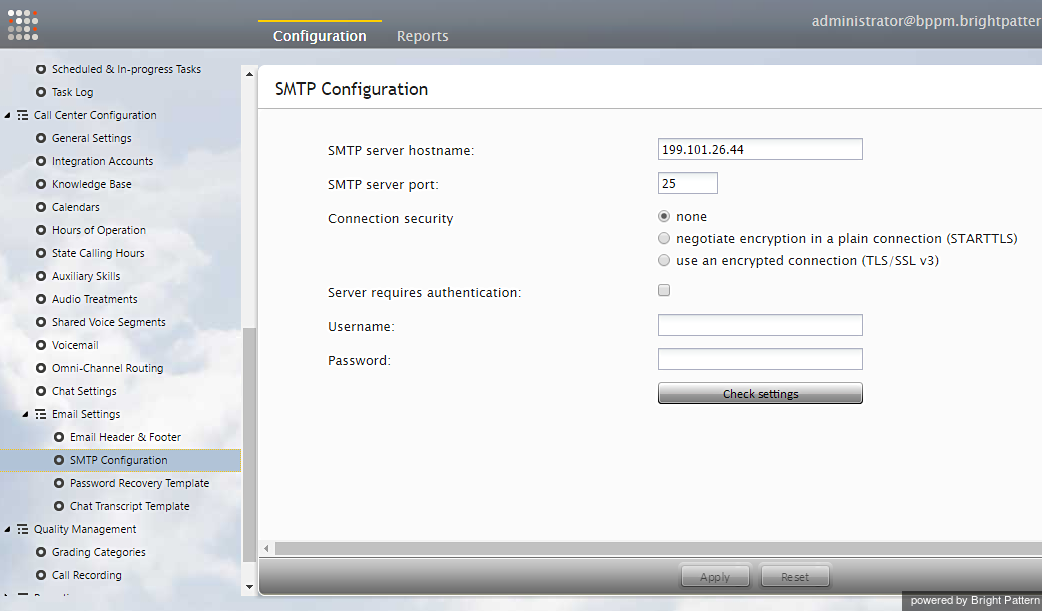
Make sure your email settings are configured properly and that an SMTP server is specified. Navigate to Call Center Configuration >> Email Settings >> SMTP Server. Then enter the server properties in the fields shown.
Step 7
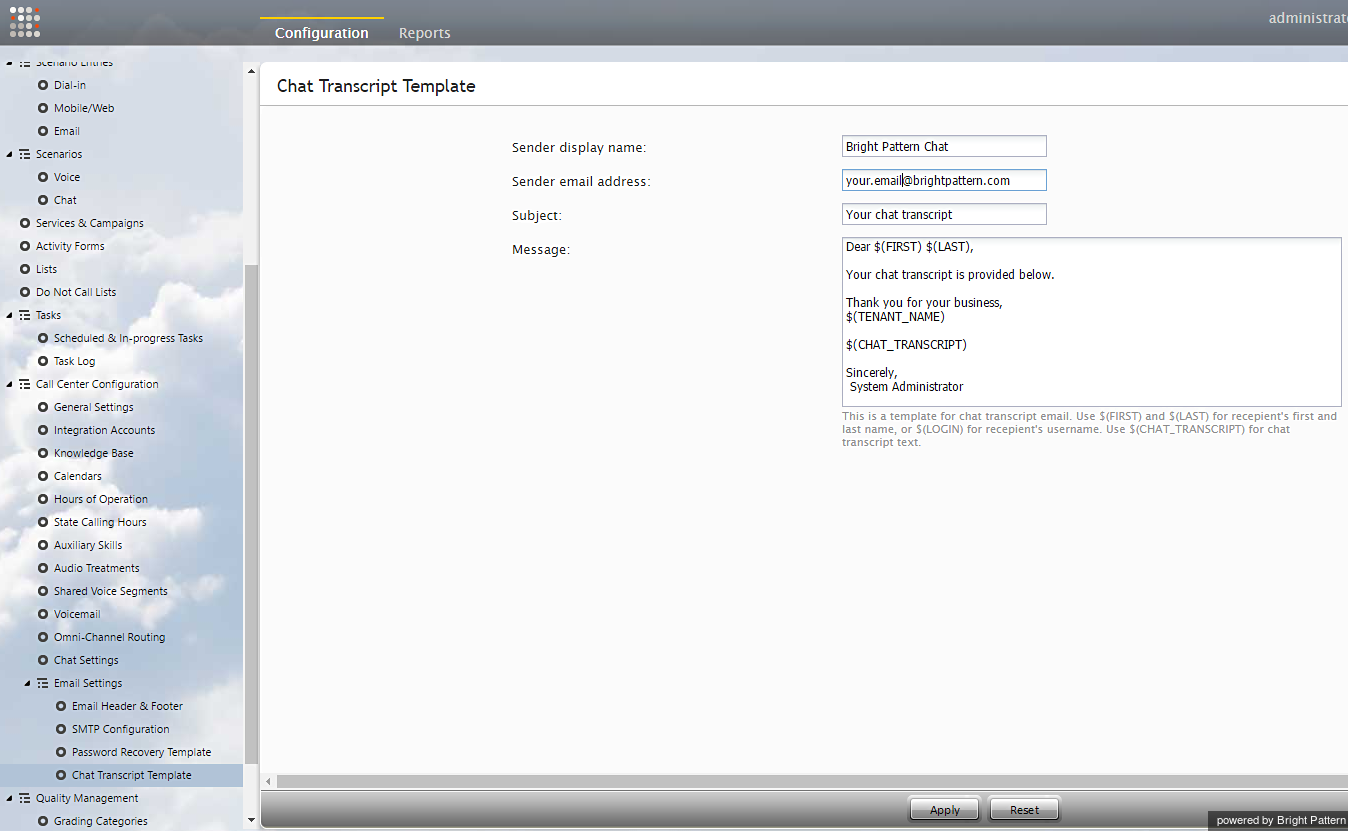
Make sure your Chat Transcript Template is defined. If you do not already have one, create one. Navigate to Call Center Configuration >> Email Settings >> Chat Transcript Template.
A chat transcript template is the standard email that will be sent to the customer. The variables on the template are automatically populated with the customer's information (from the Request Input form in the scenario), your company's information (i.e., your name), and the contents of the chat transcript. You may edit the appearance of such a friendly message in any way you like. An example chat transcript template is shown.
Fill in the following fields:
- Sender display name (your name/your organization's name)
- Sender email address (your email address--whoever is sending the email)
- Subject (email subject line)
- Message (friendly message that includes the chat transcript)
If you set up your chat transcripts exactly like this, your customer will have the option to receive a copy of the chat transcript.
What the Customer Sees
At the end of the conversation, a feedback survey will be given to the customer to complete. This survey action item was placed in the chat scenario as a Request Input block. The customer will see the survey as shown.
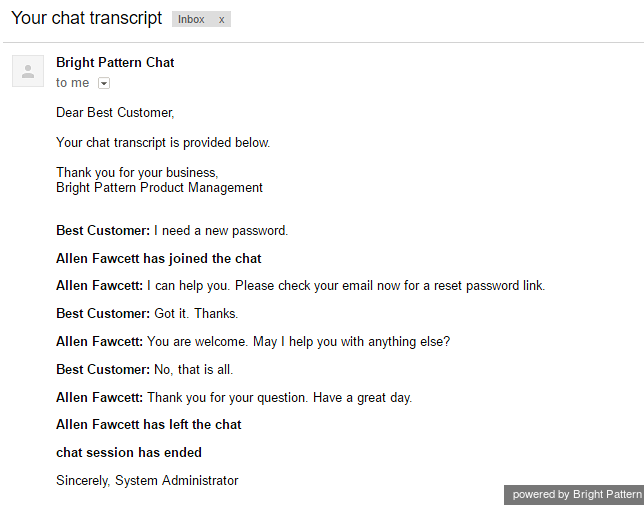
The customer completes the feedback survey and receives the chat transcript via email. An example of the email message is shown.

