How to Retrieve an Email from My Queue
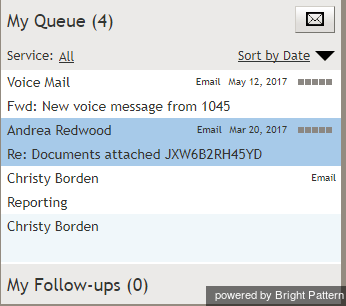
As mentioned in the How to Retrieve an Email from the Team Queue section, in addition to the Push and Pull distribution methods, an email can be assigned to you by a supervisor. Depending on your system configuration, if an incoming email is related to a case that you previously handled, such an email can also be delivered to you directly. These emails will appear in My Queue (i.e., your personal queue), from which you will be expected to retrieve them manually. My Queue looks very similar to the Team Queue described in the previous section. It is opened using the same control, displayed in the same area of your application, and provides the same information about each email.
For more information, see section How to Retrieve an Email for the Team Queue.
My Queue also contains emails that you may have worked on previously and saved as drafts. For more information, see section How to Save an Email as a Draft. Drafts are retrieved from My Queue for processing in the same way as new emails.
Emails in My Queue are arranged by the service level agreement (SLA), with the ones closest to the SLA breach appearing on top of the list.
Note: The limited space allocated for the personal queue on the desktop only allows you to see a few emails. You can scroll to see more emails.
The attachment indicator ![]() shows whether there are any attachments in the messages sent or received in the entire email thread. The indicator is displayed for each message in the thread at the end of the line in the queue.
shows whether there are any attachments in the messages sent or received in the entire email thread. The indicator is displayed for each message in the thread at the end of the line in the queue.
To retrieve an email for handling, follow these steps:
- Double-click the email or click the Open button in the editing area.
- The Active Communications List will display the email icon
indicating that you now have an active email on your desktop.
For subsequent email handling steps, see section How to Review an Incoming Email.

