Contents
- Introduction
- Starting Your Working Session
- Starting Agent Desktop
- Selecting a Phone Device
- Logging into Agent Desktop
- Installing and Updating the Agent Desktop Helper Application
- User Interface Overview
- Changing Your Agent Desktop Appearance
- Understanding Screen-pop
- Configuring Your User Profile
- Configuring Your Voicemail
- Listening to Voicemail Messages
- Call Forwarding
- 1 Using the Calendar
- Getting Help
- Understanding and Handling Your States
- How to Interpret Your Current State Information
- How to Make Yourself Ready
- How to Make Yourself Not Ready
- Handling Calls
- How to Answer an Incoming Call
- How to Reject an Incoming Call
- How to Make an Internal Call
- How to Make an Outbound Call
- How to Send Numeric Information
- How to Use the Directory
- How to Redial a Previously Dialed Number
- How to Use Favorite Contacts
- How to Mute a Call
- How to Release a Call
- How to Wrap Up After Call Work
- Dispositions and Notes
- How to Hold and Retrieve a Call
- How to Make a Consultation Call
- How to Transfer a Call
- How to Host a Conference
- How to Participate in a Conference
- How to Place a Call in a Service Queue
- How to Connect a Voice Application to Your Call
- How to Use Prerecorded Messages
- How to Record a Call
- How to Stop or Pause Call Recording
- Voice Signatures
- How to Schedule a Follow-up Activity
- How to Send SMS Messages
- Participating in an Outbound Campaign
- General Information About Outbound Campaigns
- How to Review a Calling Record
- How to Reject a Calling Record
- How to Reschedule a Call Attempt
- Handling Service Chats
- How to Accept a Chat Request
- How to Reject a Chat Request
- Chat Messages
- How to Send and Receive Pictures and Documents
- How to Transfer Your Chat Session
- How to Create and Edit Canned Chat Responses
- How to End a Chat Session
- How to Send a Secure Form
- Handling Multiple Chat Sessions
- Co-browsing
- Handling Mobile Interactions
- Handling Email
- General Information About Handling Email
- Understanding Email Cases and Threads
- How to Accept an Email
- How to Retrieve an Email from the Team Queue
- How to Retrieve an Email from My Queue
- Overview of the Email Working Area
- How to Review an Incoming Email
- How to Mask Sensitive Data
- How to Close an Email without Replying
- How to Change an Assigned Email Service
- How to Transfer an Email
- How to Forward an Email
- How to Change Default Email Font
- How to Compose a Reply
- How to Use My Follow-ups to Send a Follow-up Outbound Email
- How to Use Cases to Send a Follow-up Outbound Email
- How to Send a New Outbound Email
- How to Save an Email as a Draft
- How to Search Email Cases
- Knowledge Base
- General Information About Knowledge Base
- How to Use a Knowledge Base Article
- Contributing Content to the Knowledge Base
- Other Useful Functions
- Dashboard
- Wallboard
- Keyboard Shortcuts
- Ways to Request Assistance
- How to Use Internal Chat
- How to Report a Call Quality Problem
- How to Send Agent Desktop Application Logs to Your Administrator
- Ending Your Working Session
- Error Messages
Using the Calendar
Your Agent Desktop is equipped with a calendar where you can schedule various tasks and events related to your work, such as follow-up calls with customers. You can configure your calendar to provide reminders for such scheduled events.
How to Open the Calendar
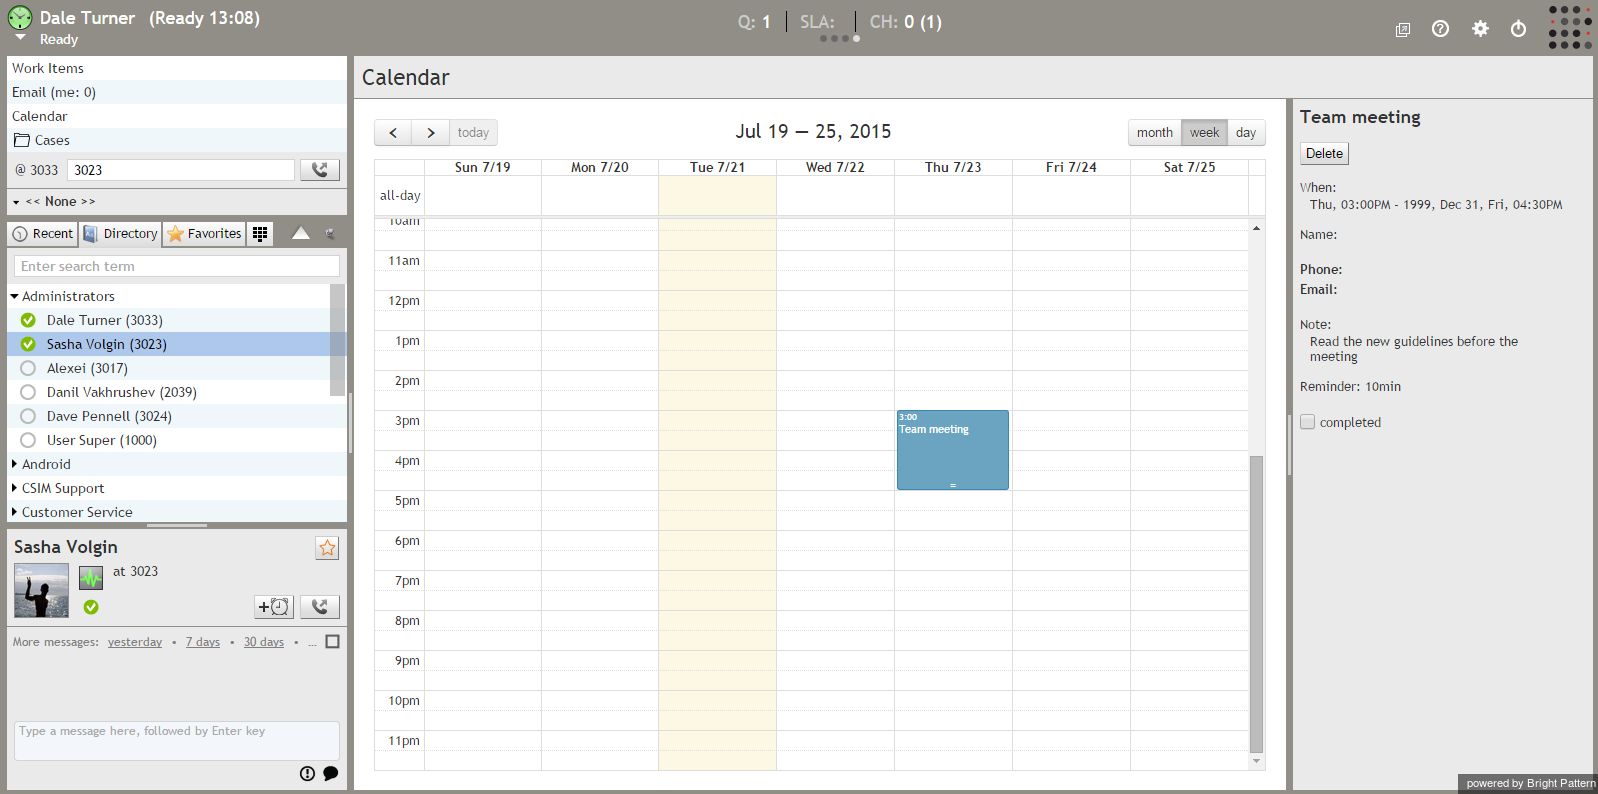
To open the calendar, click Calendar in the Active Communication List. The calendar view will open in the Context Information Area. You can use the standard controls above the calendar grid to switch between the day, week, and month views, to move to other dates in the past (<) or in the future (>), and to return to the view containing the current date (today). The current date will have a pink background.
How to Schedule an Event
Follow these steps to add items to the calendar.
- Select the desired time slot. A panel on the right will display event properties.
- Enter a title for your event.
- The time of the event will correspond to the position and duration of the time slot selected in the calendar grid. You can adjust this time using the When fields.
- Adjust the time zone if necessary.
- If your event is a scheduled call to a known contact, you can specify the contact’s Name, Phone number, and/or Email address.
- You can add a free-text Note describing the event.
- Specify how far in advance you would like to be reminded about the event.
- Click the Save button. The new event will appear in the calendar highlighted in blue color.
You can also use the calendar to schedule follow-up activities in the context of your present customer interactions directly from the Contact Info Panel. For more information, see section How to Schedule a Follow-up Activity.
How to Edit Existing Events
You can use the following methods to edit existing events:
- To reschedule an existing event, drag it to the new desired time slot directly in the calendar grid.
- To change the even duration, drag the = symbol at the bottom of the event up or down.
- To edit other event properties, including its title, click the event. Its current properties will be displayed in the panel on the right. Hover over the property you wish to change and click the
icon.
- To mark your event as completed, click the event and select the completed checkbox. Completed events will be shown in green color.
- To delete an event, click the Delete button.
Note that your supervisors can view and edit your personal calendars, reassign your scheduled tasks and events to other agents, and assign someone else’s tasks to you.
Reminders
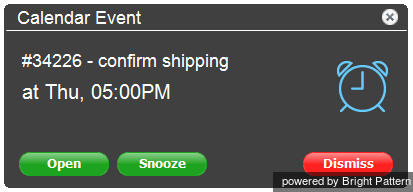
You will receive reminders about your scheduled events according to their configured reminder times. A reminder will appear as a pop-up window showing the title and start time of the event.
What you do with reminders is up to you.
- Click Open to review the event information. Note that the event will be automatically marked as completed.
- Click Snooze to be reminded about this event again in five minutes.
- Click Dismiss to close the reminder without any follow-up. Note that the event will be automatically marked as completed.


