Contents
- Introduction
- Starting Your Working Session
- Starting Agent Desktop
- Selecting a Phone Device
- Logging into Agent Desktop
- Installing and Updating the Agent Desktop Helper Application
- User Interface Overview
- Changing Your Agent Desktop Appearance
- Understanding Screen-pop
- Configuring Your User Profile
- Configuring Your Voicemail
- Listening to Voicemail Messages
- Call Forwarding
- Using the Calendar
- Getting Help
- Understanding and Handling Your States
- How to Interpret Your Current State Information
- How to Make Yourself Ready
- How to Make Yourself Not Ready
- Handling Calls
- How to Answer an Incoming Call
- How to Reject an Incoming Call
- How to Make an Internal Call
- How to Make an Outbound Call
- How to Send Numeric Information
- How to Use the Directory
- How to Redial a Previously Dialed Number
- How to Use Favorite Contacts
- How to Mute a Call
- How to Release a Call
- How to Wrap Up After Call Work
- Dispositions and Notes
- How to Hold and Retrieve a Call
- How to Make a Consultation Call
- How to Transfer a Call
- How to Host a Conference
- How to Participate in a Conference
- How to Place a Call in a Service Queue
- How to Connect a Voice Application to Your Call
- How to Use Prerecorded Messages
- How to Record a Call
- How to Stop or Pause Call Recording
- Voice Signatures
- How to Schedule a Follow-up Activity
- How to Send SMS Messages
- Participating in an Outbound Campaign
- General Information About Outbound Campaigns
- How to Review a Calling Record
- How to Reject a Calling Record
- How to Reschedule a Call Attempt
- Handling Service Chats
- How to Accept a Chat Request
- How to Reject a Chat Request
- Chat Messages
- How to Send and Receive Pictures and Documents
- How to Transfer Your Chat Session
- How to Create and Edit Canned Chat Responses
- How to End a Chat Session
- How to Send a Secure Form
- Handling Multiple Chat Sessions
- Co-browsing
- Handling Mobile Interactions
- Handling Email
- General Information About Handling Email
- Understanding Email Cases and Threads
- How to Accept an Email
- How to Retrieve an Email from the Team Queue
- How to Retrieve an Email from My Queue
- Overview of the Email Working Area
- 1 How to Review an Incoming Email
- How to Mask Sensitive Data
- How to Close an Email without Replying
- How to Change an Assigned Email Service
- How to Transfer an Email
- How to Forward an Email
- How to Change Default Email Font
- How to Compose a Reply
- How to Use My Follow-ups to Send a Follow-up Outbound Email
- How to Use Cases to Send a Follow-up Outbound Email
- How to Send a New Outbound Email
- How to Save an Email as a Draft
- How to Search Email Cases
- Knowledge Base
- General Information About Knowledge Base
- How to Use a Knowledge Base Article
- Contributing Content to the Knowledge Base
- Other Useful Functions
- Dashboard
- Wallboard
- Keyboard Shortcuts
- Ways to Request Assistance
- How to Use Internal Chat
- How to Report a Call Quality Problem
- How to Send Agent Desktop Application Logs to Your Administrator
- Ending Your Working Session
- Error Messages
How to Review an Incoming Email
After you have accepted or retrieved an email for processing, normally your next step is to review its content. The recommended order of email content analysis is given as follows.
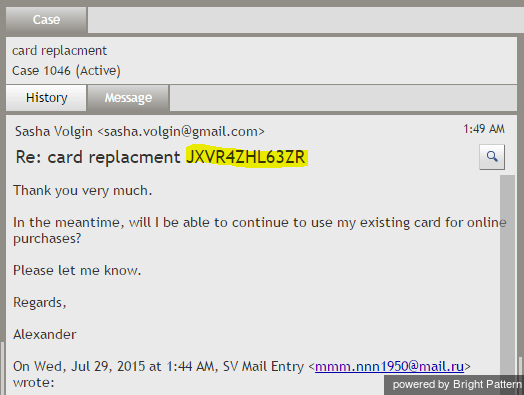
Step 1: Check for an email thread identifier.
- Locate the email subject line that is displayed above the email message body in the Message tab of the Reading Pane.
- If the subject line has an email thread identifier, this is an indication that the email is part of an existing case.
Step 2: If there is an email thread identifier, review the case history.
- If you want to review the case history before replying, click the History tab.
- All incoming
, transferred
, and outgoing
emails related to this case will be listed in the chronological order.
- Any notes that you or other agents provided with respect to this case will also be listed with the notes icon
. You can select any particular message to view its content in the message body area.
- To return to the current message, click the Message tab.
Note: Sometimes it may be convenient to see only the notes related to the case you are reviewing. To see all notes related to the current case in a single view in chronological order, click the Notes tab above the Reply Editor.
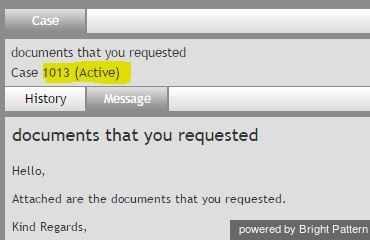
If the email subject does not contain a thread identifier, this is an indication that the email is a new customer request and a new case has just been created for this request in the system. The case number will be displayed in the Case tab above the Reading Pane.
Step 3: Read the email message.
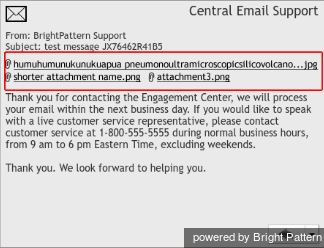
Your next step is to review the email message itself and understand how this email should be processed. Some emails may contain attachments that may also have to be reviewed before any further processing steps. If the email was sent with attachments, the file names of those attachments will be listed in the Reading Pane below the subject line of the email message.
Step 4: Open attachments.
To open an attached file, click its file name in the Reading Pane. The exact attachment viewing process depends on a number of factors including the type of file, your computer settings, and your company security policies. You will receive detailed instructions about working with email attachments from your system administrator.
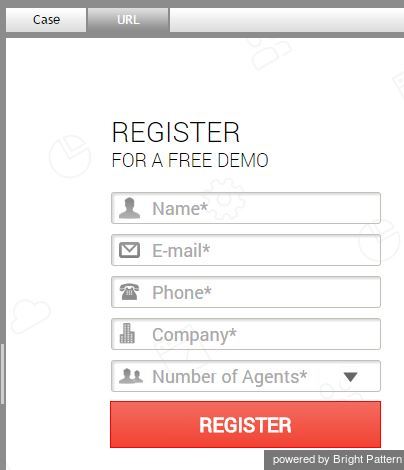
Incoming email interactions can also be accompanied with web pages and forms that can provide additional information about the requested service. In this case, you will see a URL tab next to the Case tab above the reading pane. To view the web page content, click the URL tab. The content of this tab depends entirely on the type of services that you provide and is not discussed in this Agent Guide. If this tab is displayed for emails that you handle, you will receive detailed instructions about its content from your system administrator. See section Understanding Screen-pop for more information.
Step 5: Review other included information.
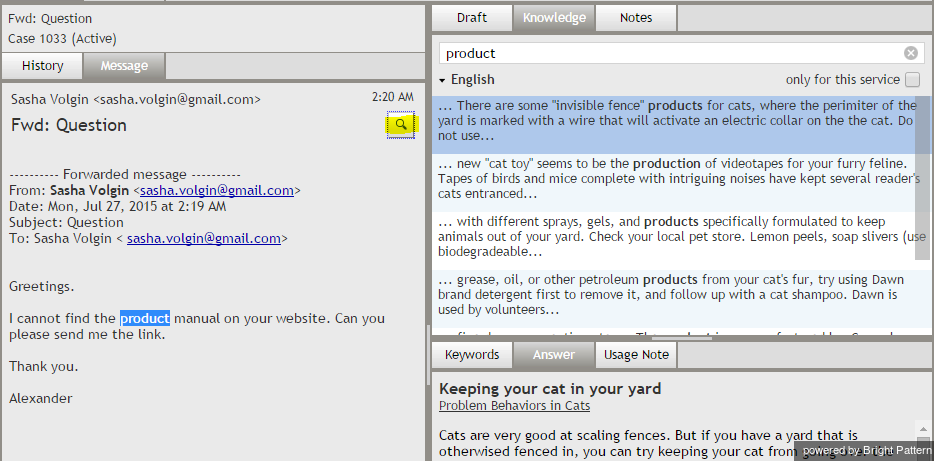
You can also look for information related to the content of the incoming email in the Knowledge Base. In the Reading Pane, select a fragment of the original email that is likely to be found in some articles of the Knowledge Base (e.g., a product name or model number). Click the button. The Knowledge Base will display a list of articles that contain phrases matching the selected fragment. For more information, see section Knowledge Base.

