How to Send a Follow-up Outbound Email
Depending on the type of service you provide, a single reply may not always be sufficient to fulfill the customer request. For example, the initial reply may simply inform the customer that his request has been received and advise him of the estimated processing time, while the actual request fulfillment will be communicated via one or more follow-up emails. To support requests that require multiple communications, each email is associated with a case and a thread. For more information, see Understanding Email Cases and Threads.
- Note: If you wish to follow up on a reply that you sent recently, it may be easier to select it from the Recent tab.
When you have all the information required to compose a follow-up email for a particular customer request, you will first have to find the case associated with this request. Either the case number or the customer name can be used to find the case.
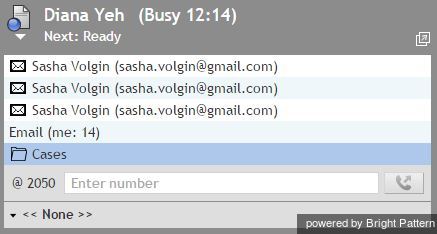
To work with cases, click the Cases entry in the Active Communications List.
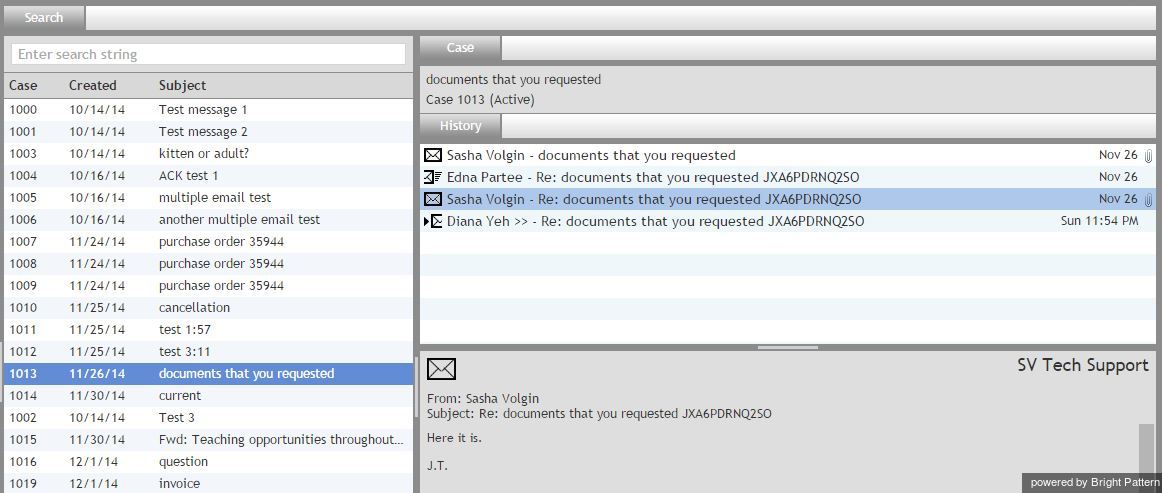
The Context Information Area will display case search functions. The left pane will have the search field and list cases matching search criteria. The right pane will show the details of the selected case.
Depending on your permissions, you will be able to see either only the cases that you have previously worked on, or all cases for the services that you are qualified to handle.
If you know the case number, enter it in the search field. Since case numbers are unique, only one case will be displayed in the list below. If you do not know the case number, you can search for cases using the customer’s name or a fragment of the subject. For each case, its number, the creation date, and the original email subject line will be displayed. Depending on their length, subjects may be shown truncated in the list view. Hover over truncated subjects to see the full content.
You can sort listed cases by case number, creation date, and alphabetically by subject.
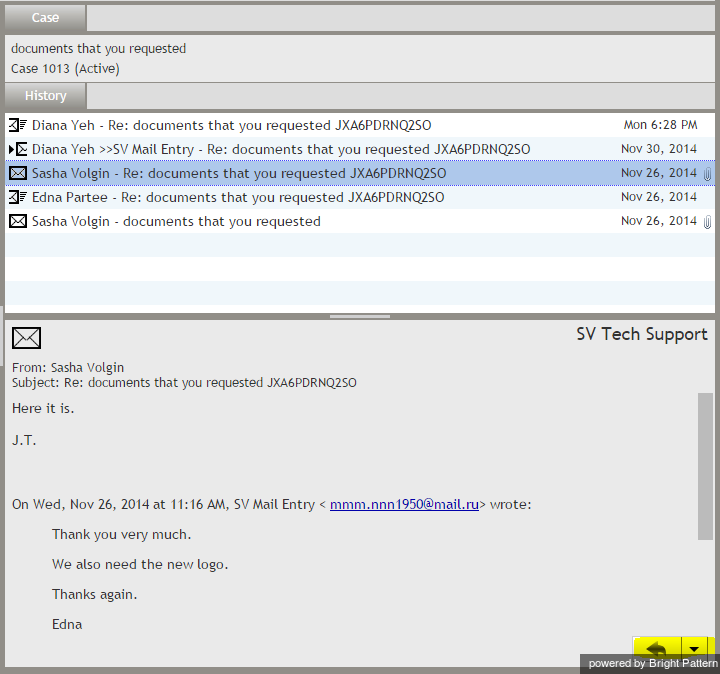
When you select a case in the list, all incoming , transferred
, and outgoing
email messages related to this case will be listed in the History tab in the chronological order. Any notes that you or other agents provided with respect to this case will also be listed with the notes icon
. When you select any particular message, its content will be displayed in the message body area below.
- Note: As mentioned above, case structure reflects business processes of your organization and services that you handle. You will receive specific instructions about handling cases and composing follow-up messages from your system administrator. As a general recommendation, remember that it is usually important to study the entire case history, including all the notes and dispositions that were entered previously for this case, before sending any new emails related to it.
To send a follow-up email, select the customer email that this follow-up message will directly relate to and click the Reply button.
This email will appear in your Active Communications List. The Context Information Area will display the familiar email processing views and controls. For more information, see Overview of the Email Working Area. From this moment, composing your follow-up email will be no different from composing the first reply. For more information see How to Compose a Reply.
If you do not see the Open button for the email you wish to follow up on, this means that another agent is working on this email already.


