Voicemail
ServicePattern supports voicemail functions. For more information about ServicePattern voicemail, see sections Configuring Your Voicemail and Listening to Voicemail Messages of the ServicePattern Agent Guide.
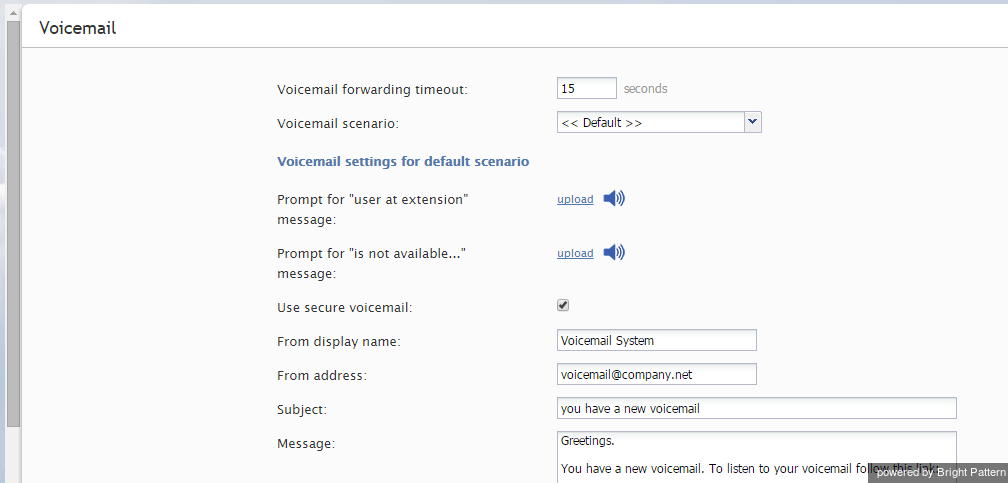
To configure general (system-level) voicemail settings, select the Voicemail option from the Call Center Configuration menu. Personal email settings are configured via the Users menu of the Contact Center Administrator application and/or User Profile settings of the Agent Desktop application.
The Voicemail screen properties are described in the following table:
| Voicemail screen properties | |
|---|---|
| Voicemail forwarding timeout | The default timeout for forwarding of unanswered calls to voicemail. The default value is 15 seconds. Users can re-define this timeout via their individual profile settings. |
| Voicemail scenario | Indicates which scenario should be used for voicemail function. The Default scenario is built-in and is configured using the remaining settings on this screen. The default scenario provides a generic voicemail function that should be sufficient in most cases. For complex voicemail functions (e.g., different content of the email notification depending on the type of call), you can define a different scenario that can use any number of Voicemail blocks configured for various conditions. |
| Prompt for “user at extension” message | This setting can be changed for the Default voice mail scenario only (see above).
The pre-recorded default greeting is in English and sounds like this: The user at extension [user’s extension number] is not available. At the tone please record your message. Use this setting to modify the segment of this greeting that comes before the extension variable. Note that users can record personalized greetings, which will be applied instead of this default greeting when someone tries to reach them in their absence. |
| Prompt for “is not available…” message | This setting can be changed for the Default voice mail scenario only (see above).
Use this setting to modify the segment of this greeting that comes after the extension variable in the pre-recorded default greeting (see above). |
| Use secure voicemail | This setting can be changed for the Default voice mail scenario only (see above).
Voicemail notifications are delivered to users via email. By default, voicemail messages are attached to those emails as audio files and can be played back via any standard media players. If you select this checkbox, the voicemail messages will be stored encrypted in the system and the emails will instead contain a link that will require authentication prior to message playback. For more information, see section Listening to Voicemail Messages of the ServicePattern Agent Guide. Note that any user registered in the system will be able to listen to the voice message upon clicking the link and logging in. This capability is essential to enable message recipients to forward some of their voicemail to other users. If you wish to ensure that only the original recipients can access their voicemail, create a different voicemail scenario with option Allow only this user enabled. |
| From display name | This setting can be changed for the Default voice mail scenario only (see above).
Display name of the email sender. |
| From address | This setting can be changed for the Default voice mail scenario only (see above).
Email address of the email sender. |
| Subject | This setting can be changed for the Default voice mail scenario only (see above).
The subject line of the email. |
| Message | This setting can be changed for the Default voice mail scenario only (see above).
The text to be sent as a message body. If the email notification contains an access link (as opposed to an audio file attachment), the link should consist of your agent desktop URL and variable $(URL_SUFFIX). For example, http://abc-insurance.my-service-provider.com/$(URL_SUFFIX). To insert and edit default message body text, click default. |

