How to Change an Assigned Email Service
Any incoming email will be automatically associated with one of the emails services configured in your system. Email services play the same role as phone call services. They are used, in particular, to make sure that emails are delivered to the agents who know how to handle them. In order to identify the requested service, the system analyzes the subject and body of the email to match some pre-defined keywords that would be typically associated a given service. This process is called categorization. For example, in order to associate an email with a technical support service, the system may check emails for presence of words problem, issue, help, support, etc. If the system cannot find any keywords in the incoming email, the email will be associated with a general (default) service.
If your customers normally use web forms to compose their email service requests, the above process will guarantee reliable service identification for almost every email. When customers use a general-purpose email application to contact your company, there is a greater chance that an email may be categorized insufficiently (i.e., associated with a default service) or incorrectly (i.e., associated with a wrong service).
Therefore, the first steps in processing of a new email is verifying the associated service, and if necessary, changing such automatic association. Note that this step can be skipped for emails that are part of the existing cases; see section How to Review an Incoming Email for more information.
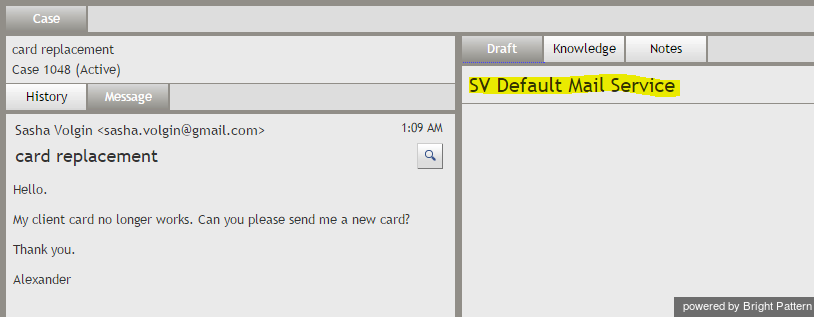
When you review an incoming email, the currently assigned service is displayed in the Reply Editor.
- Note: For emails distributed via push method, you will also see the service name in the alert pop-up window. For emails distributed via the pull method, you may be able to see abbreviated service names in the team queue.
If the service association is correct, you can proceed to composing a reply. If the service is assigned incorrectly, there are several possibilities:
- You know what the correct service is, and you are qualified to handle it.
- You know what the correct service is, but you are not qualified to handle it.
- You do not know what the correct service is.
If you know the correct service and you are qualified to handle it, you should normally change the assigned service and keep this email at your desktop for further processing. To change the service, click the drop down icon next to the currently assigned service name. The menu will show the services that you are qualified to handle. Select the correct service and proceed to composing a reply.
If you know what the correct service is, but you are not qualified to handle it, you should transfer the email to the correct service. If you are not sure what the correct service is, you can transfer the email to your supervisor or another agent. For more information, see section How to Transfer an Email.


