How to Send SMS Messages
Depending on the service configuration and your personal permissions, you may be able to send text messages via the Short Message Service (SMS) to customers who use mobile phones. This capability can be useful when you need to give your customers information that is better communicated as text, e.g., a confirmation number, mailing address, or web link.
Text messages can be sent at any time: when you are on the phone with the mobile customer, while performing the related after-call work, and after you have finished processing of the call. If the customer replies to your text, the system will deliver this message to you, associate with your original message, and present it to you in the form of a chat session.
To send an SMS message to a customer while handling his service call (i.e., while you are in the Busy or After-call Work state):
- Make sure the service associated with this call supports SMS communications; if this is the case, the Send SMS icon
will be displayed next to the customer’s number the Contact Info Panel.
- If necessary, confirm with the customer that his phone can receive SMS messages.
- Click the Send SMS icon.
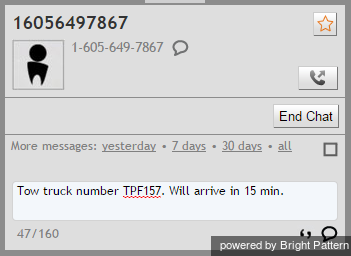
- Type the desired message in the Text Input Field.
- You can use the Pre-defined text message icon
to enter a message from your pre-defined text message set. For more information about pre-defined messages, see section How to Create and Edit Canned Chat Responses. Note that there is a limit for the number of characters in one SMS message. The limit (160 characters) and the current number of characters already entered are displayed below the text input field.
- When the message is ready, press Enter or click Send SMS icon below
. The message will be sent to the customer and will appear with a timestamp in the transcript area above the Text Input Field. When the system confirms message transmission with the carrier, the status of the message will be displayed as Delivered.
If the customer replies to your message, his message will appear in the transcript area highlighted in a different color.
You can continue exchanging SMS messages in this manner for as long as necessary. All such messages will be presented to you via transcript as part of the same conversation. Note that such exchange can extend beyond the call and even beyond your current login session.
When you know that the message exchange is over, click the End Chat button. Note that if the customer continues to send SMS messages to you after you end the session, those messages will be ignored.
To send an SMS message to a customer while in Ready or Not Ready state:
- Select the service associated with this SMS message. See section How to Make an Outbound Call for more information about selecting services.
- If the selected service is configured to support SMS messages, the Send SMS button
will be displayed next to the Number Input Field, adjacent to the Call button.
- In the Number Input Field, enter the customer’s phone number. Make sure this is a mobile number.
- Click the Send SMS button. The Contact Info Panel will display an active chat session with the entered number and the Text Input Field at the bottom.
- Follow steps 3 to 6 of the process of sending an SMS message to a customer while handling his service call (see above).
- Note: Depending on you contact center configuration, your customers may also be able to initiate a contact with you via SMS. For you, as an agent, such SMS messages will be presented in the same way as if they were regular incoming service chat requests. For more information, see section Handling Service Chats.

