Contents
- Introduction
- General Information
- Contact Center Configuration Process
- Initial General Configuration
- Inbound Voice and Chat Service Configuration
- Outbound Campaign Configuration
- Email Service Configuration
- Users and Teams
- Overview
- Users
- Forwarding and Voicemail Operation
- 1 Teams
- Agent Dashboard Metrics
- Roles
- Privileges
- Skill Levels
- Help Screens
- Directory
- Scenario Entries
- Scenarios
- Services and Campaigns
- Services and Campaigns Overview
- Properties Tab
- Assignments Tab
- Lists Tab
- Dispositions Tab
- Activity Tab
- Numbers Tab
- Service Level Tab
- Outbound Tab
- Results Tab
- Archive Tab
- Canned Tab
- Email Tab
- Pre-defined Dispositions
- Outbound - General
- Outbound - Calling Hours
- Outbound - Dial Rules
- Outbound - DNC
- Outbound - Diagnostics
- Activity Forms
- Lists
- Tasks
- Call Center Configuration
- General Settings
- Integration Accounts
- Knowledge Base
- Calendars
- Hours of Operation
- State Calling Hours
- Auxiliary Skills
- Audio Treatments
- Shared Voice Segments
- Voicemail
- Omni-Channel Routing
- Chat Settings
- Email Settings
- Quality Management
- Reporting
- Security
- Appendices
Teams
Teams typically reflect the organization of your contact center. Agent teams, for example, are organized for convenient real-time management so that when a supervisor logs into his or her desktop application, the supervisor will see only the agents of the team that the supervisor is assigned to manage. Agent teams will also appear in historical reports for team-level performance evaluation. Note that team membership of agents may not have any direct effect on the distribution of specific service interactions to them.
Teams for other contact center personnel are set up for organizational purposes only. For example, you can have teams that reflect main functions of contact center management (e.g., campaign operators, scenario designers, workforce managers). Upon initial solution setup, the default team Administrators is created automatically. You can use this team to register initially all non-agent personnel who need access to the system. Note that team membership of non-agents does not have any effect on their ability to access specific contact center resources and functions. Such ability is defined by roles assigned at the individual user level. (See section Roles for more information.)
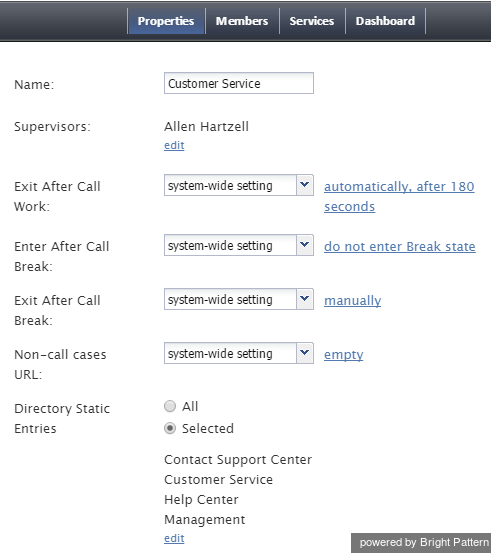
Note: Supervisors are assigned at the team level. You may add a supervisor to a team from the Properties tab > Supervisors (see the screen properties below).
To set up and edit teams, select the Teams option from the Users & Teams menu.
Organization
Teams are organized into four tabs shown at the top of your screen: Properties, Members, Services, and Dashboard. Click each tab to view and edit specific fields.
Properties Tab
Name
The Name is the team name. This field is mandatory, and the name must be unique within the contact center.
Supervisors
Supervisors who are assigned to manage this team may be optionally added. To add a supervisor, click edit and select one or more supervisors from the list of users that have the supervisor role. This setting, while optional, is essential for agent teams only. Supervisors assigned to a team will be able to monitor activities of all agents in that team in real time via their desktop applications. Supervisors themselves may or may not be members of the teams that they are assigned to supervise. The system does not impose any restrictions on how many teams one supervisor can be assigned to manage.
Exit After Call Work
Exit After Call Work allows you to set the maximum time in the After-call Work state for the agents of this team. This setting is optional and is essential for agent teams only.
A pull-down menu displays three options:
- Select system-wide setting to use the timeout defined at the contact center level
- Select manually to allow the agents of this team to remain in the After-call Work state until they exit this state manually
- Select automatically, after to set the desired timeout in seconds.
Enter After Call Break
Enter After Call Break enables you to specify whether the agents of this team will be allowed to have any rest time when they finish handling a service call (including After-call Work, if it is defined). This setting is optional and essential for agent teams only.
A pull-down menu displays three options:
- Select system-wide setting to use the contact-center-level setting
- Select enter Break state to enable the rest time
- Select do not enter Break state to make agents automatically ready for next call as soon as they finish handling of current service calls. If you click do not enter Break state to the right of the pull-down menu, you will be directed to the General Settings page for configuring your break settings. If you do not wish to change those settings, go back by clicking Teams on the main menu on the left-hand side of the screen.
Exit After Call Break
Exit After Call Break is where you set the maximum time in the Break state after finishing a service call for the agents of this team. This setting is optional and is essential for agent teams only.
A pull-down menu displays three options:
- Select system-wide setting to use the timeout defined at the contact center level
- Select manually to allow the agents of this team to remain in the Break state until they exit this state manually
- Select automatically, after to set the desired timeout (in seconds).
If you click manually to the right of the pull-down menu, you will be directed to the General Settings page for configuring your break settings. If you do not wish to change those settings, go back by clicking Teams on the main menu on the left-hand side of the screen.
Non-call cases URL
Non-call cases URL is the web page URL that will be displayed for agents upon delivery of a service interaction (unless another URL is provided via the Web Screenpop block of the applied scenario or via the settings of the corresponding campaign).
A pull-down menu displays three options:
- Select system-wide setting to display the web page defined at the contact center level
- Select none to display no web pages
- Select custom to set a web page specific to the agents of this team.
If you click empty to the right of the pull-down menu, you will be directed to the General Settings page for configuring your break settings. If you do not wish to change those settings, go back by clicking Teams on the main menu on the left-hand side of the screen.
Directory Static Entries
Static entries describe names and contacts of people/organizations that are external to your contact center. These entries appear in the directory of the Agent Desktop application. For your convenience, related static entries are arranged in folders.
By default, agents will be able to see All directory folders. To select specific folders that the agents of this team will be able to see, click Selected, click edit, and select the folders in the dialog window that appears. Highlight the desired folders and click the arrow buttons to select or remove them; then hit OK.
Members tab
Members List
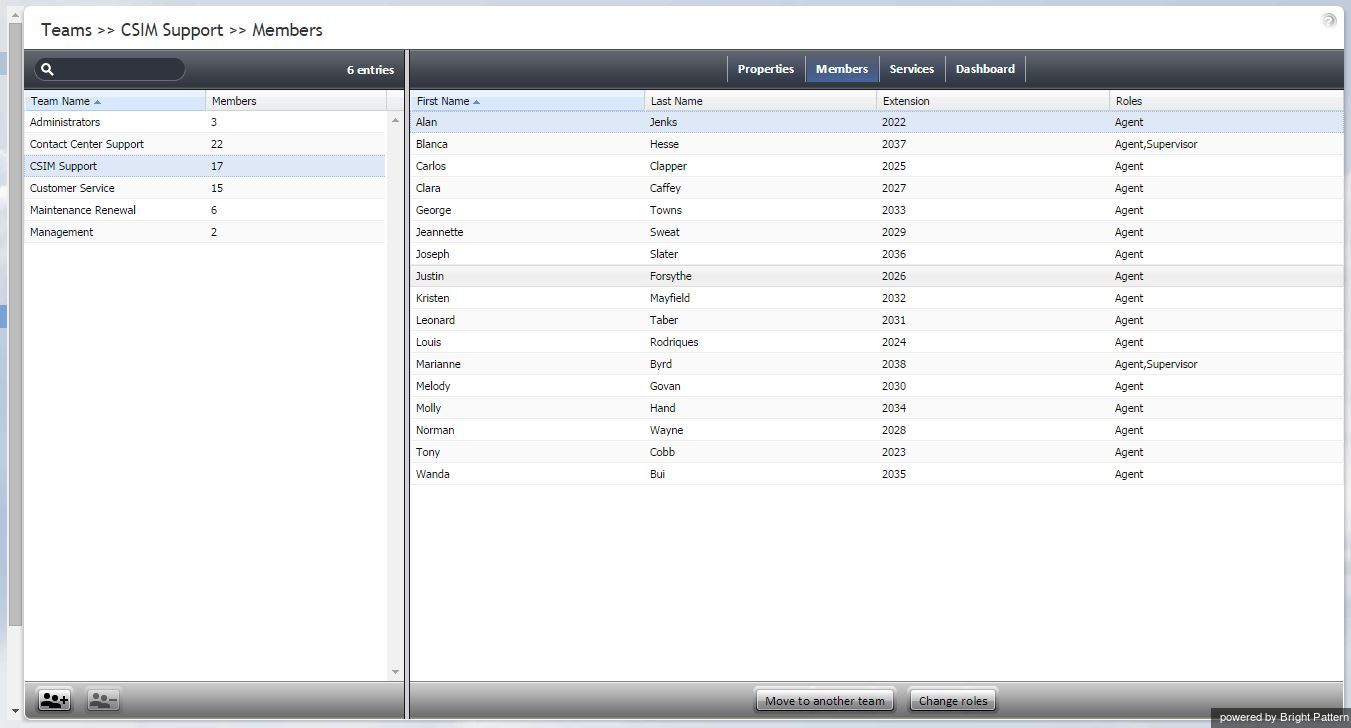
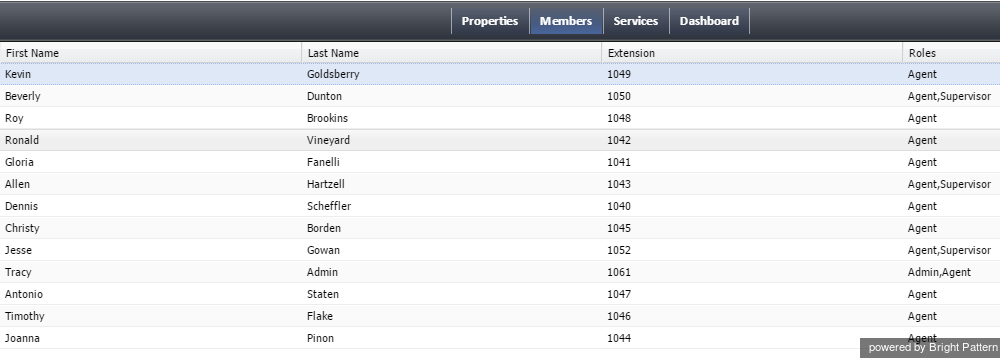
The Members List shows all the members (i.e., users) who are currently assigned to this team. Each team member is listed with the following information displayed: first name, last name, extension number, and assigned roles.
Move to another team
Located at the bottom of the window, the Move to another team button allows you to move selected members (users) to a different team. Select one or more members from the list, and then click the button. In the dialog box that pops up, select the team in which your selected member (user) will be placed. Click OK.
Change roles
Located at the bottom of the window, the Change roles button control allows you to assign or remove the roles of the selected user(s). Select one or more users from the list, click Change roles, and select the new role(s) as appropriate. Click OK.
Services tab
Services and campaigns provided by this team
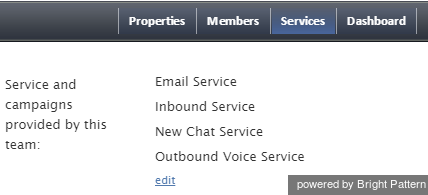
This setting allows you to designate the services that are provided by the agents of this team. This setting is essential for agent teams only. When you assign a service to an agent team, you have the option to assign the default service skill to all members this team with a specific level. If you select this option, all current and future members of the team will get this service skill automatically. Individual levels can be changed manually later. In addition, when you assign a service to a team, supervisors of that team will be able to monitor this service in real time via their desktop applications. For more information, see section Skill Levels.
Click "edit" to assign one or more of the available services to this team and/or to remove previously assigned services. Note that when you remove a service from a team, the associated default service skill will be removed from all members of this team. In the dialog box that pops up, select from the Available services on the left and use the arrow controls to move them to Selected services on the right. To unassign services from the team, select from the Selected services' on the right and use the arrow controls to move them to the Available services on the left.
Dashboard tab
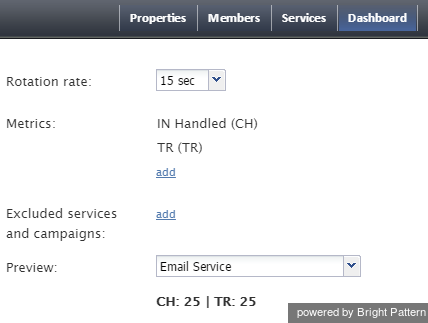
The Dashboard tab contains properties that let you configure the content and appearance of metrics for the agents of the given team.
General information
The Agent Desktop application shows agents real-time metrics related to their personal performance, as well as the performance of their teams and services that they deliver. For more information, see section Dashboard of the Agent Guide.
Rotation rate
If an agent handles interactions for several different services/campaigns, metrics related to those services will be displayed for one service at a time. The dashboard will automatically rotate displayed services. Rotation rate defines the frequency with which such rotation will take place. From the pull-down menu, select from the following rates (in seconds): none, 5 sec, 10 sec, 15 sec, or 20 sec.
Metrics
Metrics are the data that will be displayed for members of the given team. To add a metric, click add and select the desired metric from the drop-down Metric menu. For descriptions of the available metrics, see section Agent Dashboard Metrics.
To help with self-evaluation, current values of an agent personal metrics can be provided with the agent’s current ranking within the team (checkbox Show team ranking), and performance of the closest other agent in ranking (checkbox Show next value).
Newly created dashboard metrics will appear at the end of the list. To change the position of a metric in the dashboard, drag it to the desired new location. To edit or remove an existing metric, hover your cursor over it and select the desired function.
Label
The Label is the metric name as it will be displayed in the Agent Desktop. Due to the limited space allocated for the metrics on the desktop, metric names should be displayed in an abbreviated form.
Show team ranking
Show team ranking is available for personal agents’ metrics only. Select this option if you want the agent’s metric value to be accompanied with his current ranking within the team according to this metric. This can help agents with self-evaluation of their performance.
Show next value
Show next value is available for personal agents’ metrics only. Select this option if you want the agent’s metric value to be accompanied with the value of the same metric for the agent who is directly ahead of this one in the current ranking. (If the agent currently has the top ranking, the value of the next best agent will be displayed.)
Excluded services and campaigns
By default, the metrics you configure will be displayed for all services and campaigns assigned to the given team. If you do not want certain services to be displayed, click add and select the services that should be excluded.
Preview
Preview shows you how the dashboard that you have configured will be displayed in the Agent Desktop application.
Note that due to a limited space allocated for the metrics on Agent Desktop, if the given team provides multiple services, metrics related to those services will be displayed for one service at a time.
To see what the dashboard will look like for a specific service, select the desired service from the list. (The difference in the dashboard appearance for different services may be due to service-specific disposition metrics.

