Contents
- Introduction
- General Information
- Contact Center Configuration Process
- Initial General Configuration
- Inbound Voice and Chat Service Configuration
- Outbound Campaign Configuration
- Email Service Configuration
- Users and Teams
- Overview
- Users
- Forwarding and Voicemail Operation
- Teams
- Agent Dashboard Metrics
- Roles
- Privileges
- Skill Levels
- Help Screens
- Directory
- Scenario Entries
- Scenario Entries Overview
- Dial-in
- Chat (discontinued)
- 1 Mobile and Web
- 1.1 Mobile/Web Scenario Entries Screen Properties
- 1.1.1 Name
- 1.1.2 Unique identifier
- 1.1.3 Scenario
- 1.1.4 Service
- 1.1.5 Requested skills
- 1.1.6 Parameters expected
- 1.1.7 SMS access numbers
- 1.1.8 Connect agent by phone automatically
- 1.1.9 Connect after delay of
- 1.1.10 Queuing priority
- 1.1.11 Hours of Operation
- 1.1.12 Visible to agents
- 1.1.13 Directory folder
- 1.1.14 Chat nick for system messages
- 1.1.15 Web HTML snippet
- 1.1.16 Scenario parameters
- 1.1.17 Chat session icon
- 1.1 Mobile/Web Scenario Entries Screen Properties
- Scenarios
- Services and Campaigns
- Services and Campaigns Overview
- Properties Tab
- Assignments Tab
- Lists Tab
- Dispositions Tab
- Activity Tab
- Numbers Tab
- Service Level Tab
- Outbound Tab
- Results Tab
- Archive Tab
- Canned Tab
- Email Tab
- Pre-defined Dispositions
- Outbound - General
- Outbound - Calling Hours
- Outbound - Dial Rules
- Outbound - DNC
- Outbound - Diagnostics
- Activity Forms
- Lists
- Tasks
- Call Center Configuration
- General Settings
- Integration Accounts
- Knowledge Base
- Calendars
- Hours of Operation
- State Calling Hours
- Auxiliary Skills
- Audio Treatments
- Shared Voice Segments
- Voicemail
- Omni-Channel Routing
- Chat Settings
- Email Settings
- Quality Management
- Reporting
- Security
- Appendices
Mobile and Web
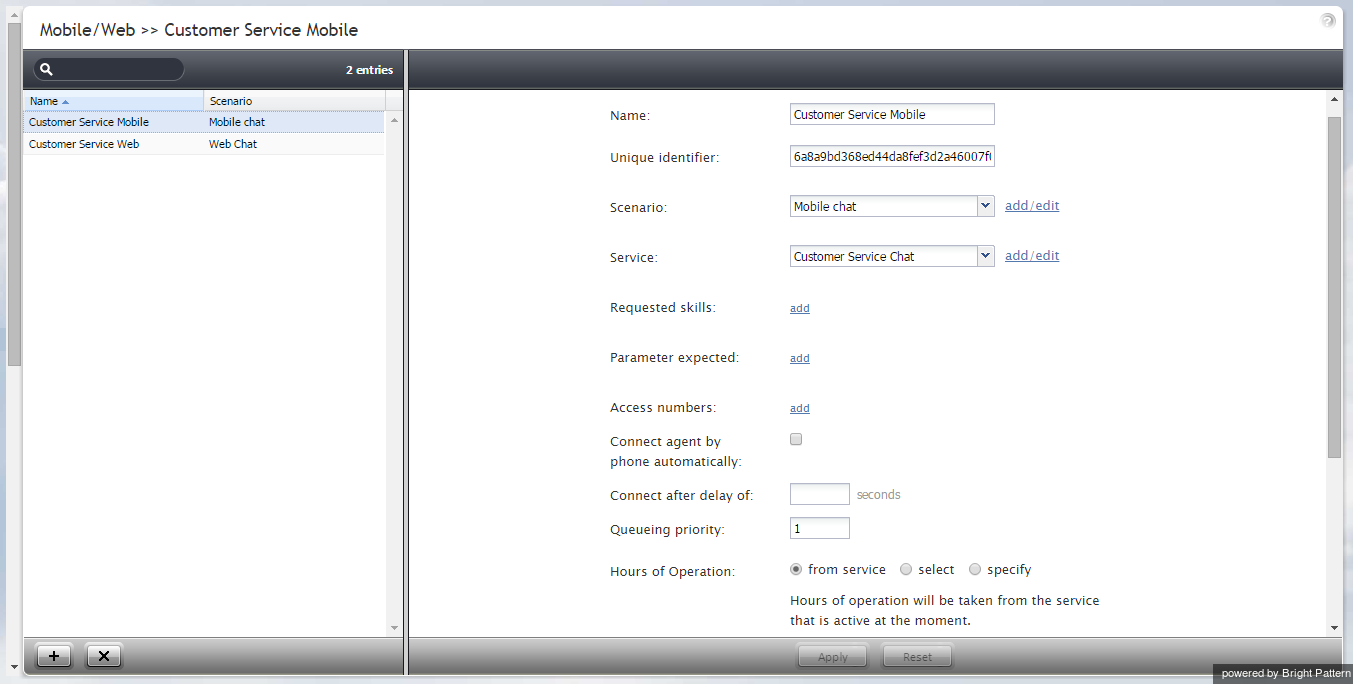
Mobile/web scenario entries are used to associate scenarios with contacts requested via mobile and web applications.
To set up and manage such associations, select the Mobile/Web option from the Scenario Entries menu.
Mobile/Web Scenario Entries Screen Properties
The Mobile/Web Scenario Entries screen properties are described as follows.
Name
Name is the name of this mobile/web scenario entry. This field is mandatory and must be unique within the contact center.
Unique identifier
The Unique identifier is generated by the system for this scenario entry. This identifier must be used as Application ID in the mobile and/or web applications that will connect to your contact center via this scenario entry. For more information, see section General Information of the Bright Pattern Mobile/Web API Specification.
Scenario
Scenario is the Chat scenario that will process chat requests arriving via this entry point.
Service
This is the service associated with this scenario entry. Entering a service is optional. See the corresponding description for the Dial-in scenario entries for more information.
Requested skills
Requested skills are the auxiliary skills that the agents must possess in order to handle chats arriving through this scenario entry. This field is optional. See the corresponding description for the Dial-in scenario entries for more information.
Parameters expected
Parameters expected are the parameters that may be expected by the scenario in session requests coming from the mobile applications (e.g., customer’s name). These parameters are optional. They may be used, for example, to look for the most qualified agents to handle the requested chat sessions and/or to display user information for the agents. For more information, see section Expected parameters of the Mobile/Web API Specification.
To define a new parameter, click add, select the parameter type, and specify its name. To edit or remove existing parameters, hover over their names.
SMS access numbers
Bright Pattern Contact Center enables customers to request and carry on chat conversations via SMS. Such SMS-based chat requests are initially made to a dedicated access number. Subsequent treatment of such requests, including routing, Agent Desktop, and reporting, is no different from the processing of regular chat sessions.
Use this setting to specify the number that the customers will use to initiate such SMS chat conversations. Note that this must be an access number assigned to you by the service provider and dedicated to SMS communications (i.e., an access number that appears in the [number]/SMS format in the Access Numbers list view).
You can assign more than one access number to one scenario entry, but the same number cannot be assigned to multiple entries.
Connect agent by phone automatically
Any mobile application contact is initially presented to the agent as a chat request. However, if the mobile application transmits the customer’s mobile phone number, this number will be displayed at the Agent Desktop, and the agent can call the number to establish a voice call with the customer. Select the Connect agent by phone automatically checkbox if you wish for such voice calls to be initiated automatically whenever the phone number is available.
Connect after delay of
If you selected the Connect agent by phone automatically checkbox, you can define how quickly the automated call to the customer mobile number will be initiated. A slight delay may be desirable if, for example, the agent needs some time to review information that comes with the original request.
Queuing priority
Queuing priority is the priority of interactions arriving through this scenario entry. This field is optional. See the corresponding description for the Dial-in scenario entries for more information.
Hours of Operation
Hours of Operation (HOP) refers to the schedule for this scenario entry point. This field is optional. See the corresponding description for the Dial-in scenario entries for more information.
Visible to agents
Visible to agents indicates whether this scenario entry shall appear in the Agent Desktop directory. See the corresponding description for the Dial-in scenario entries for more information.
Directory folder
Directory folder is the folder of the Agent Desktop directory where this scenario entry will appear if enabled by the previous option. See the corresponding description for the Dial-in scenario entries for more information.
Chat nick for system messages
Chat nick for system messages is the name that will be displayed to the customers when they get automated chat responses through this scenario entry (e.g., during an initial data collection stage). By default, this is the name of your contact center (tenant name) that is defined at the service provider level.
Web HTML snippet
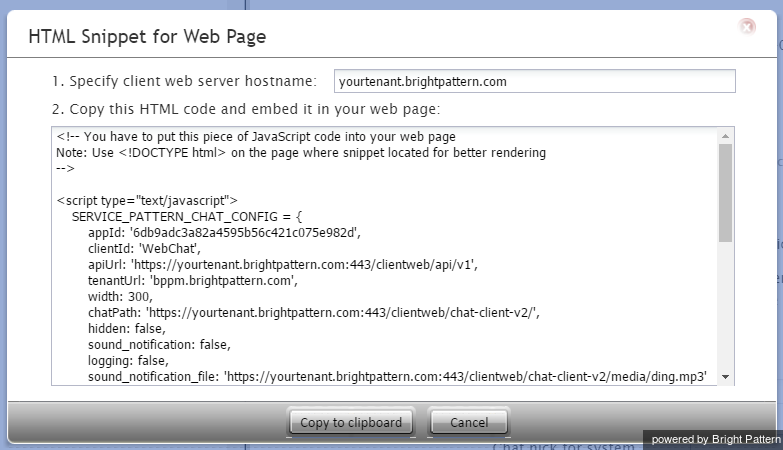
Web HTML snippet provides access to the web elements of the chat application that customers will use to access your contact center via the given scenario entry.
You can either use an out-of-the-box chat application hosted by your service provider, or you can create your own application.
To use the out-of-the-box application, click the HTML snippet button, copy the HTML snippet code, and embed it into your web page(s). Normally, it is not necessary to change the default client web server hostname. You will do so only if instructed by your service provider.
To create your own application, click the Client application button. A zip file with the code of the out-of-the-box application (see above) will be downloaded to your computer. You can modify this code to match the look and feel of your company website, and implement additional application functionality using the Mobile/Web API.
Co-browsing
During a web chat, co-browsing functionality allows the agent to view the customer’s screen and follow the customer’s scrolling movements. Co-browsing is initiated during the chat by the customer--not the agent--and screen sharing ends when either the customer clicks Stop or when the chat is terminated. Co-browsing is configured in the code (see section HTML Snippet above) of the chat application that customers will use to access your contact center. To allow and configure co-browsing for your web chats, you must have system access to either your tenant’s HTML snippet code and/or your organization’s web page itself.
How to Enable Co-browsing
- In Contact Center Administrator, navigate to Scenario Entries > Mobile/Web.
- Select the desired chat scenario entry.
- In the Properties pane, click the HTML snippet button, and copy all of the code to your clipboard.
- Paste the copied HTML code onto your web page. This embeds the chat application into your web page. Do not hit Publish yet.
- At the bottom of the code, after the chatpath, hit Return and paste the following: togetherJS_enabled : true,
- Publish the web page and refresh any active chats.
How Co-browsing Works
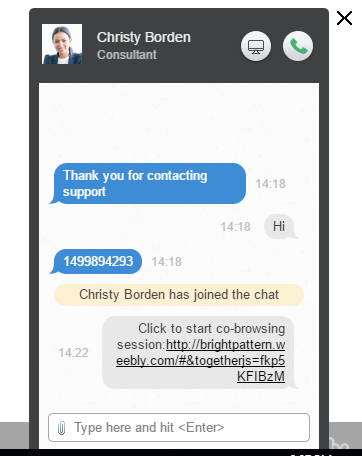
This additional code (togetherJS_enabled : true,) causes the chat application to display the Co-browsing ![]() button to customers during active chats. When the customer clicks the Co-browsing button, a URL is sent to the agent in the chat message.
button to customers during active chats. When the customer clicks the Co-browsing button, a URL is sent to the agent in the chat message.
When the agent clicks the URL, the customer’s screen appears on the agent’s screen. The agent can follow the customer’s scrolling movements and view the customer’s screen only.
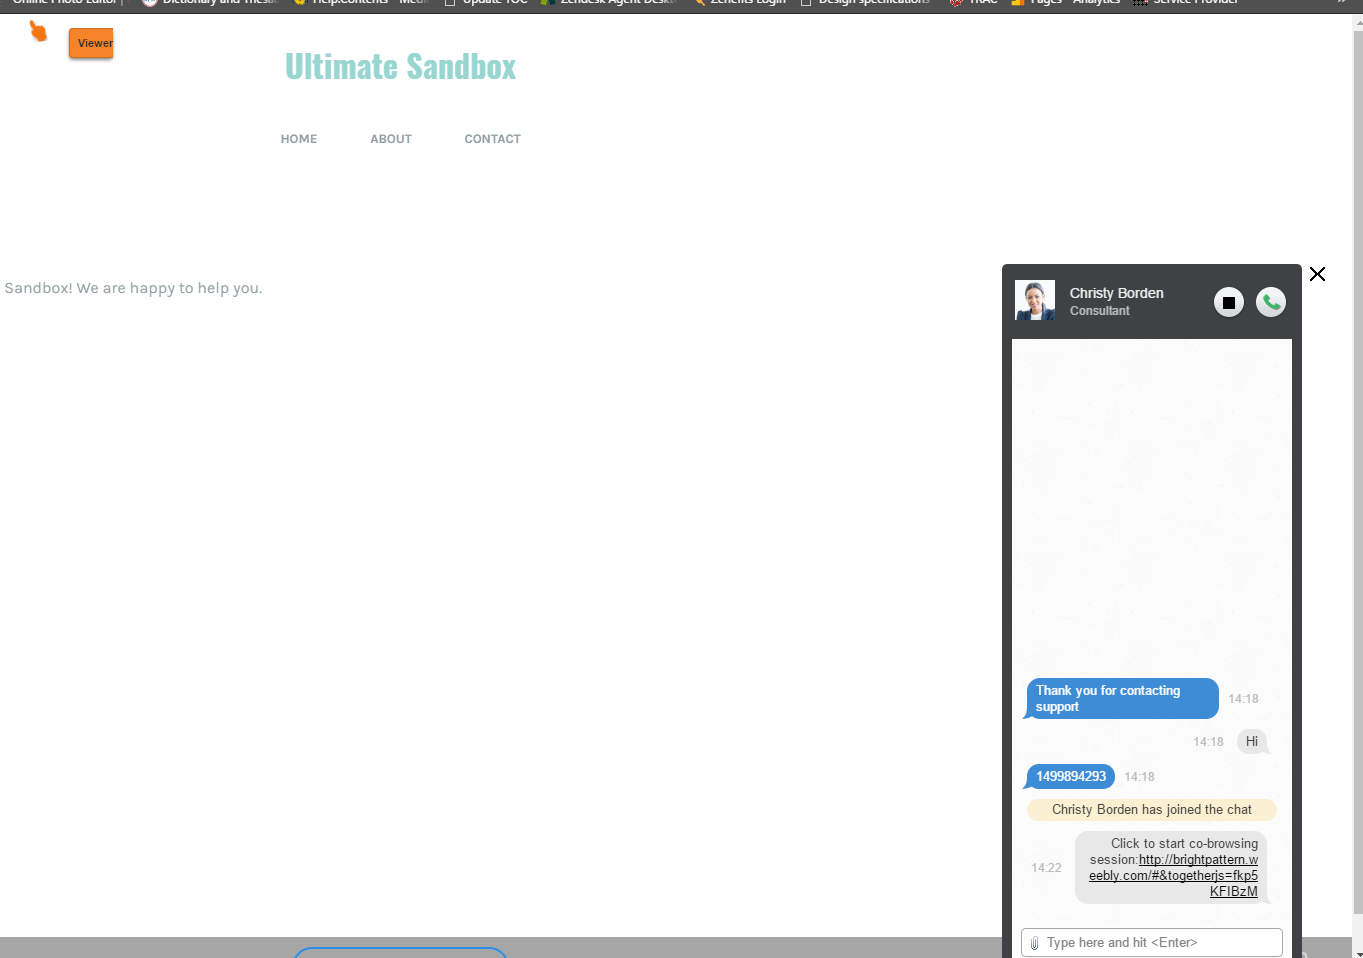
An orange hand icon, along with the label “Viewer”, is displayed on the customer’s screen to indicate that an agent is currently viewing the screen in Co-browsing mode. Similarly, the agent will see a circle icon that indicates the agent is viewing the customer’s screen.
Co-browsing is turned off when the customer clicks the Stop button on the active chat window.
Scenario parameters
Scenario parameters are optional. See the corresponding description for the Dial-in scenario entries for more information.
Chat session icon
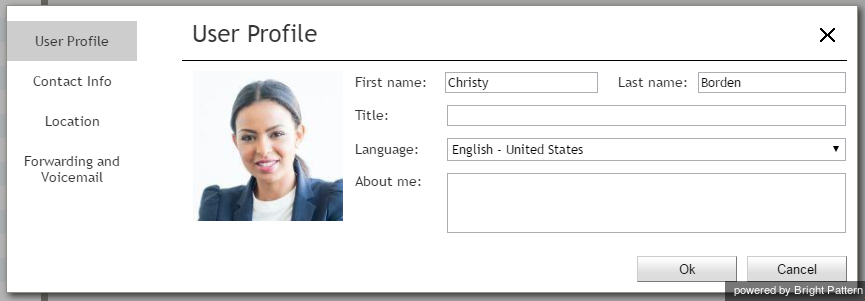
The chat session icon appears in the customer-facing chat window during active chat sessions. You have the option of uploading an icon (e.g., logo, photo, etc.) on a system-wide level, which will be seen in chat windows for all customers interacting with agents in your tenant. If uploaded, this icon overrides photos that agents have uploaded to their User Profile in the Agent Desktop application, which are normally seen by customers in their active chat windows.
Leaving this field empty or removing a chat session icon allows chat windows to display the photo that an agent has uploaded to his or her User Profile (if available).
For example, agent Christy Borden has uploaded a photo to her User Profile, as shown.
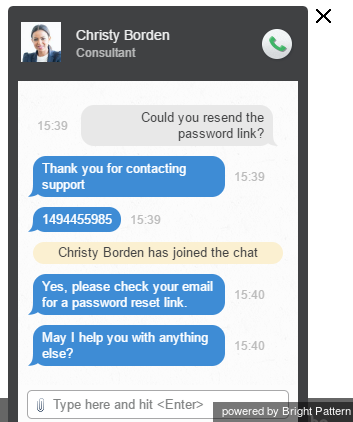
The agent's uploaded photo appears in the customer's active chat window, as shown.
Uploading a chat session icon causes the agent's photo in the chat window to be replaced by the icon that you uploaded. Note that you must click Apply to save your changes. Also note that the chat session icon that you upload does not override agents' User Profile photos--only the display photos shown in active chat windows.
In all new chat interactions, the customer's chat window will display the chat session icon that you have uploaded.
In addition, web notifications that pop on agent replies when the visitor's browser window with chat is minimized, or overlapped by other windows, will also contain the chat session icon for all agents.

